Edit an Existing Gateway
Editing an existing gateway allows for seamless adjustments in ensuring optimal functionality and efficiency.
- From the gateway listing page, click to select the gateway.
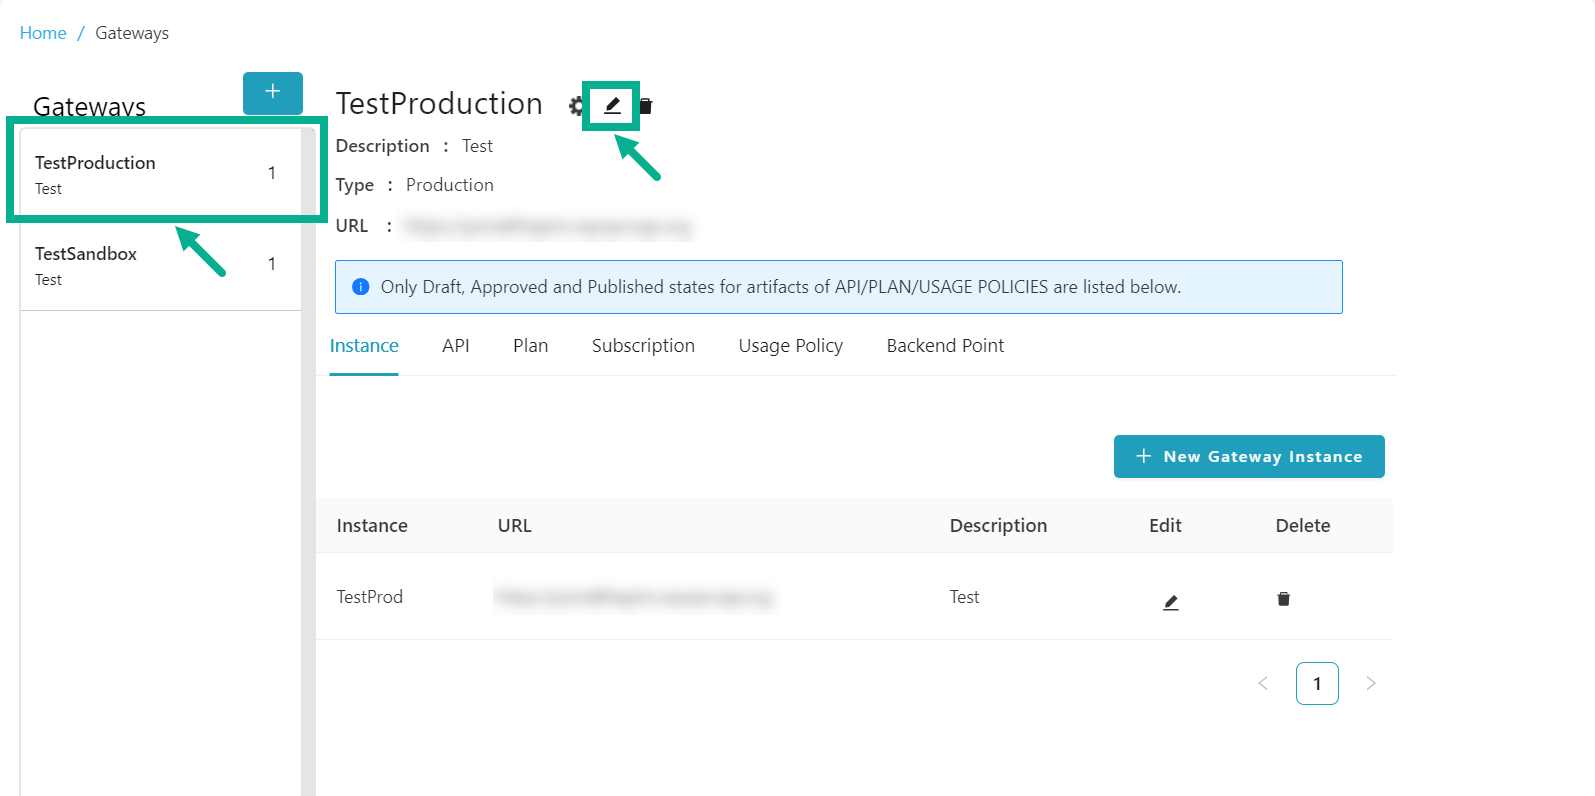
- Click the Edit icon.
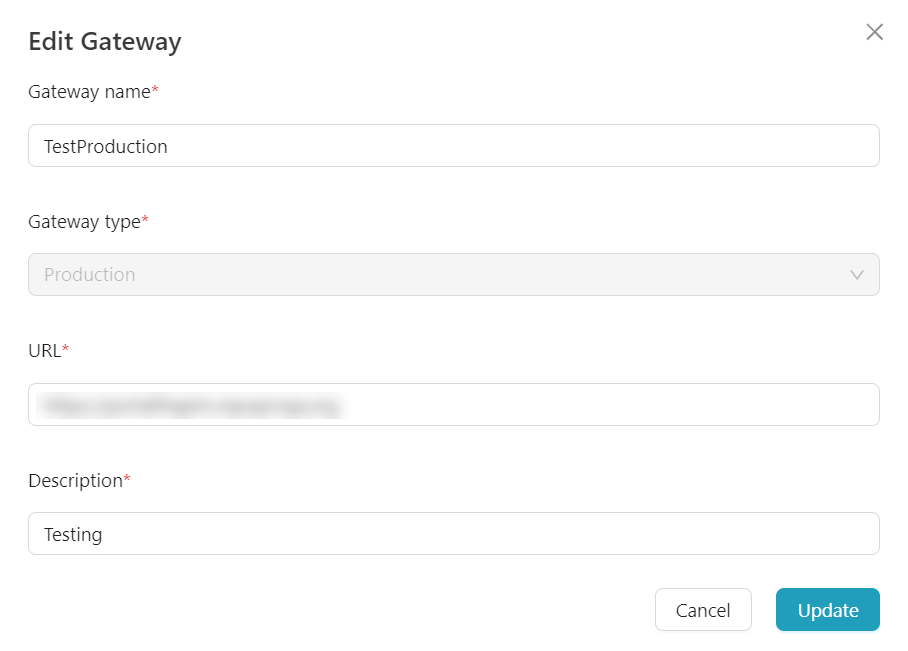
Edit Gateway dialog box appears as shown below.
-
Update the Gateway name, URL and Description as per the requirement.
-
Click Update.
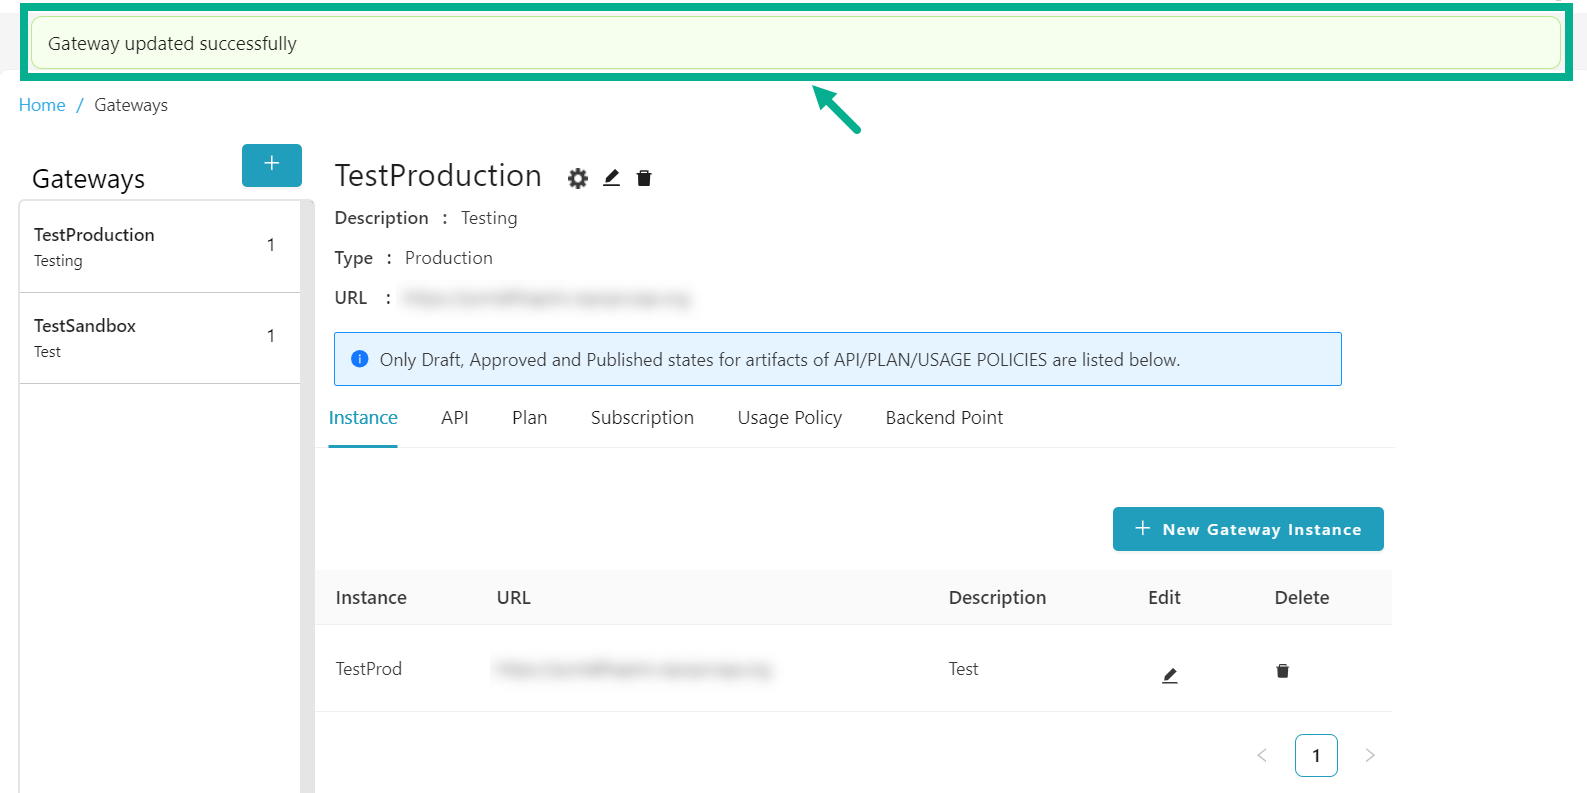
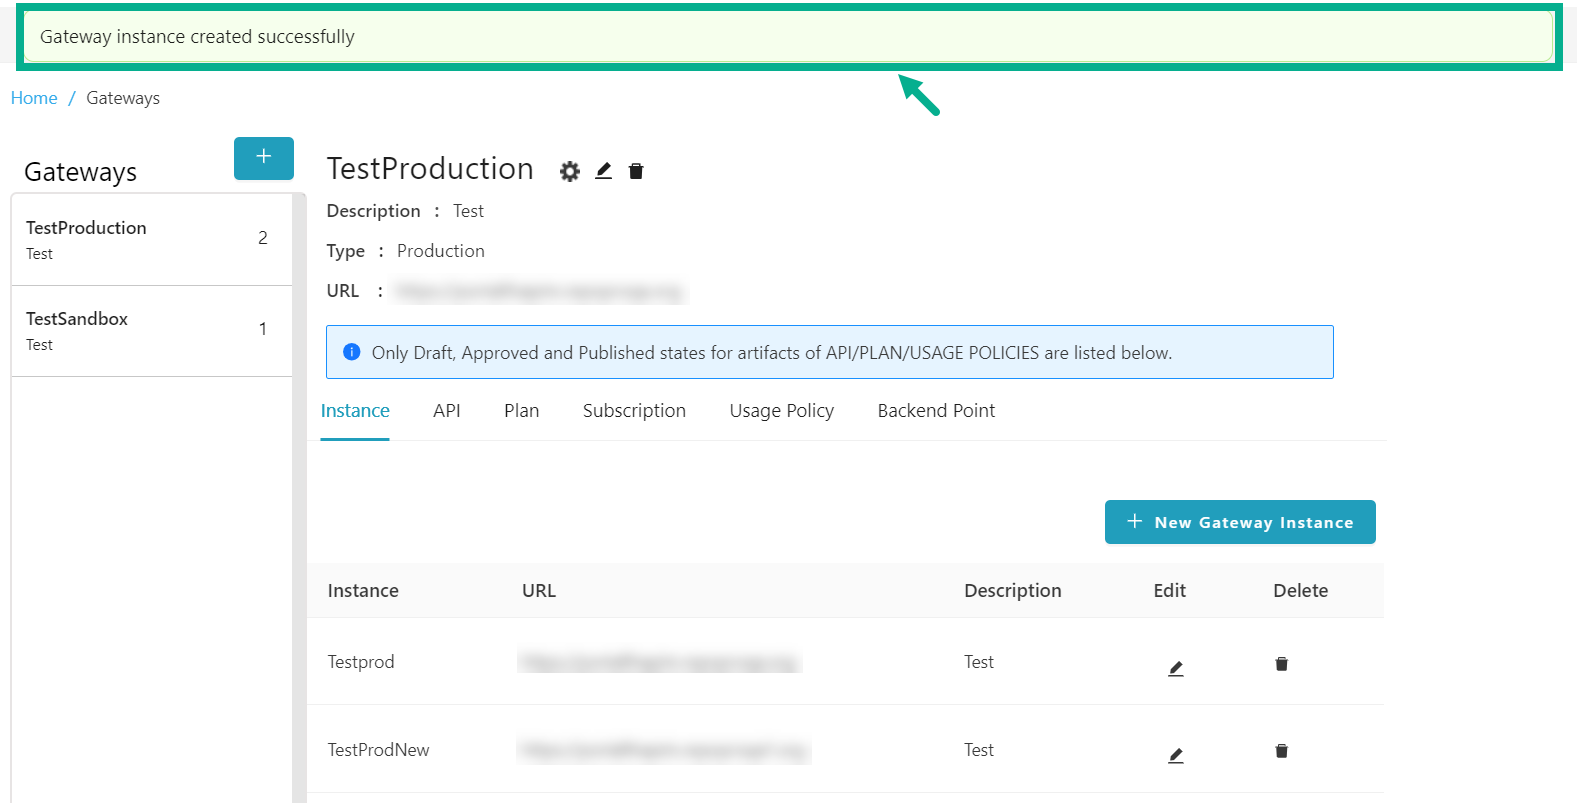
On updating, the confirmation message appears as shown below.
Instance
The Instance page displays a list of all the instances mapped to the Gateway.
Add New Gateway Instance
- From the gateway listing page, click to select the gateway.
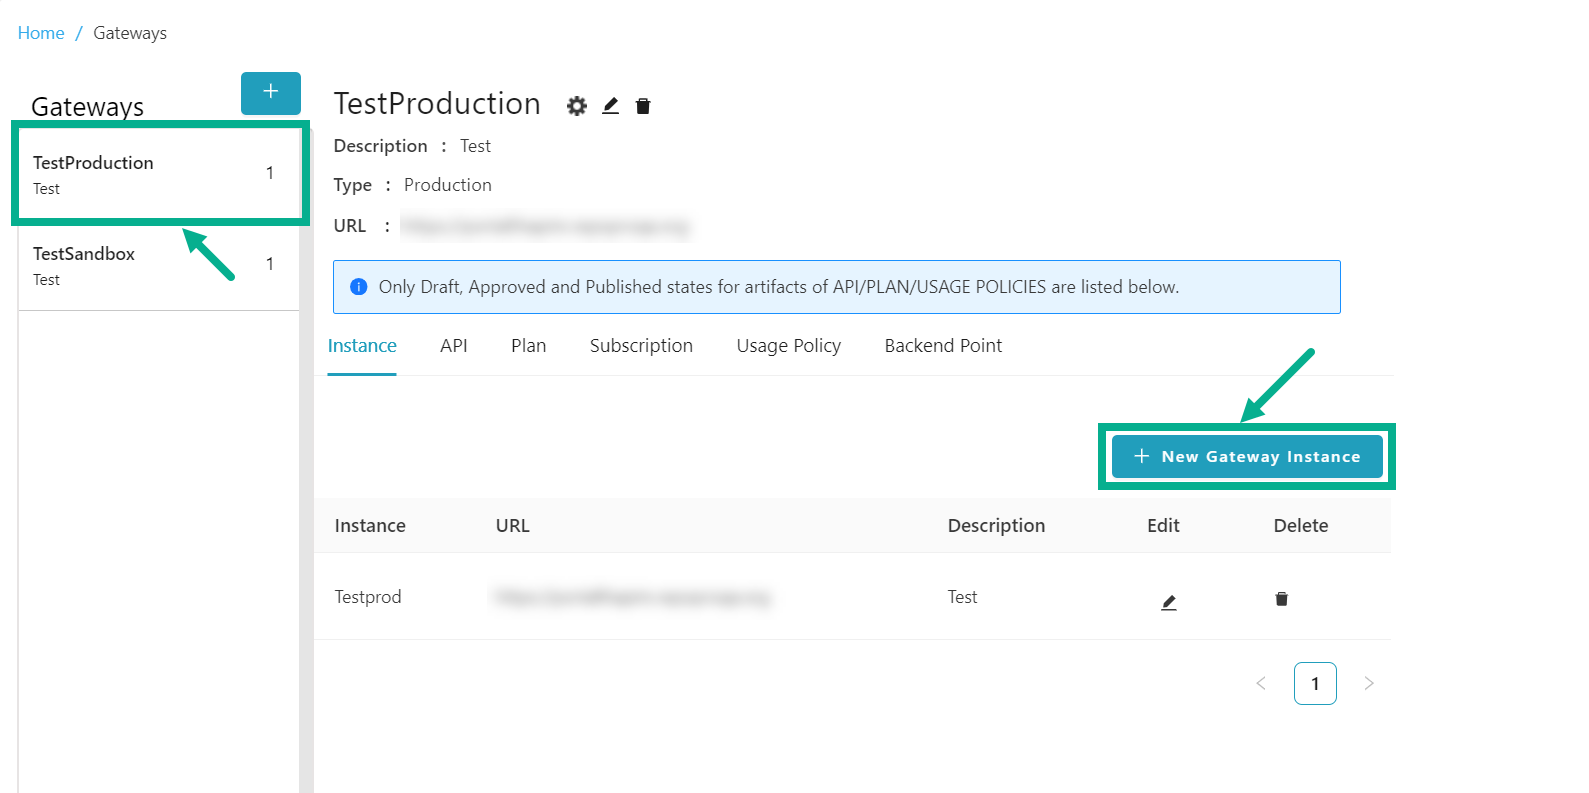
- Click Add Gateway Instance.
Add gateway instance dialog box appears as shown below.

-
Enter the Gateway Instance name, URL and Description.
-
Click Add.
On adding, the confirmation message appears as shown below.
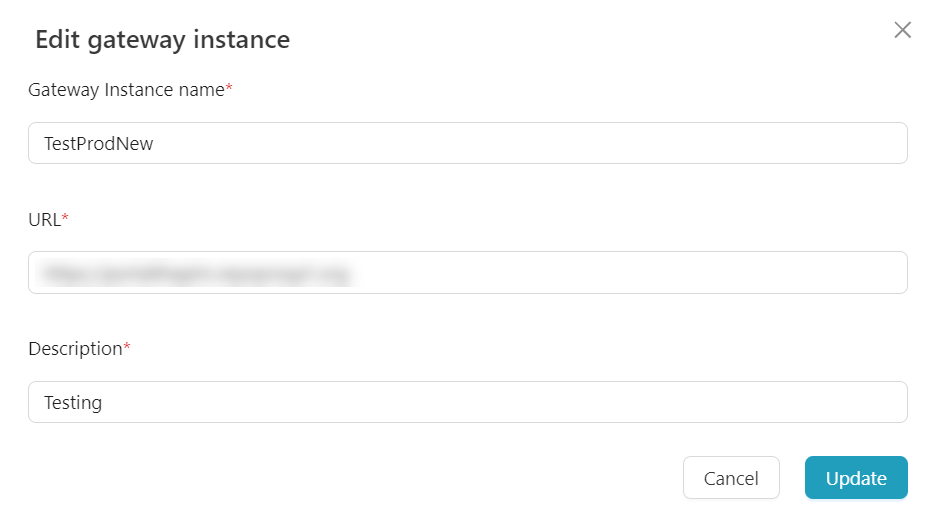
Edit a Gateway Instance
- From the gateway listing page, click to select the gateway.
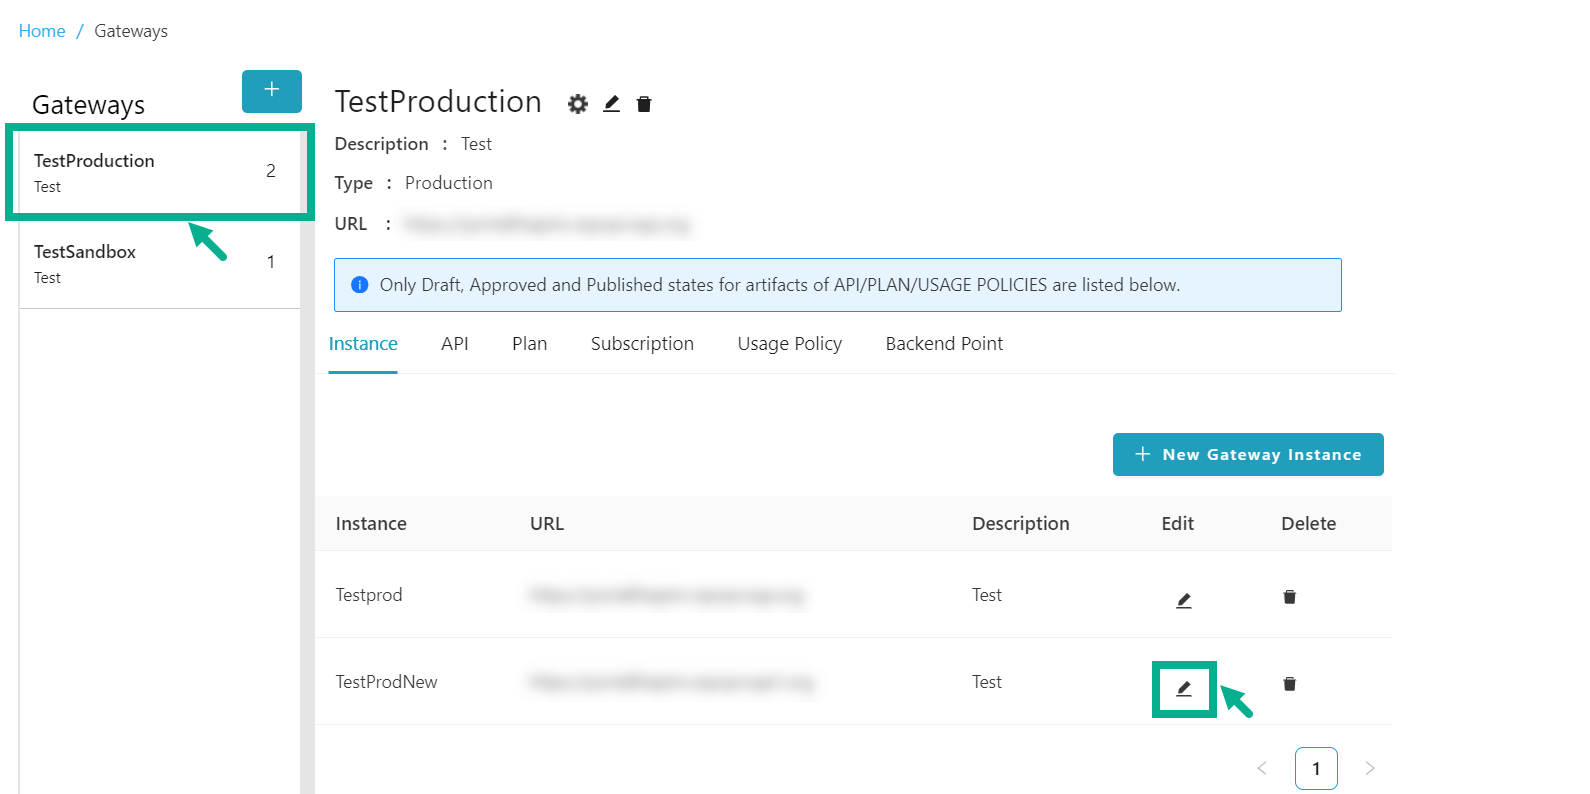
- Click the Edit icon.
Edit gateway instance dialog box appears as shown below.
-
Update the Gateway Instance name, URL and Description.
-
Click Update.
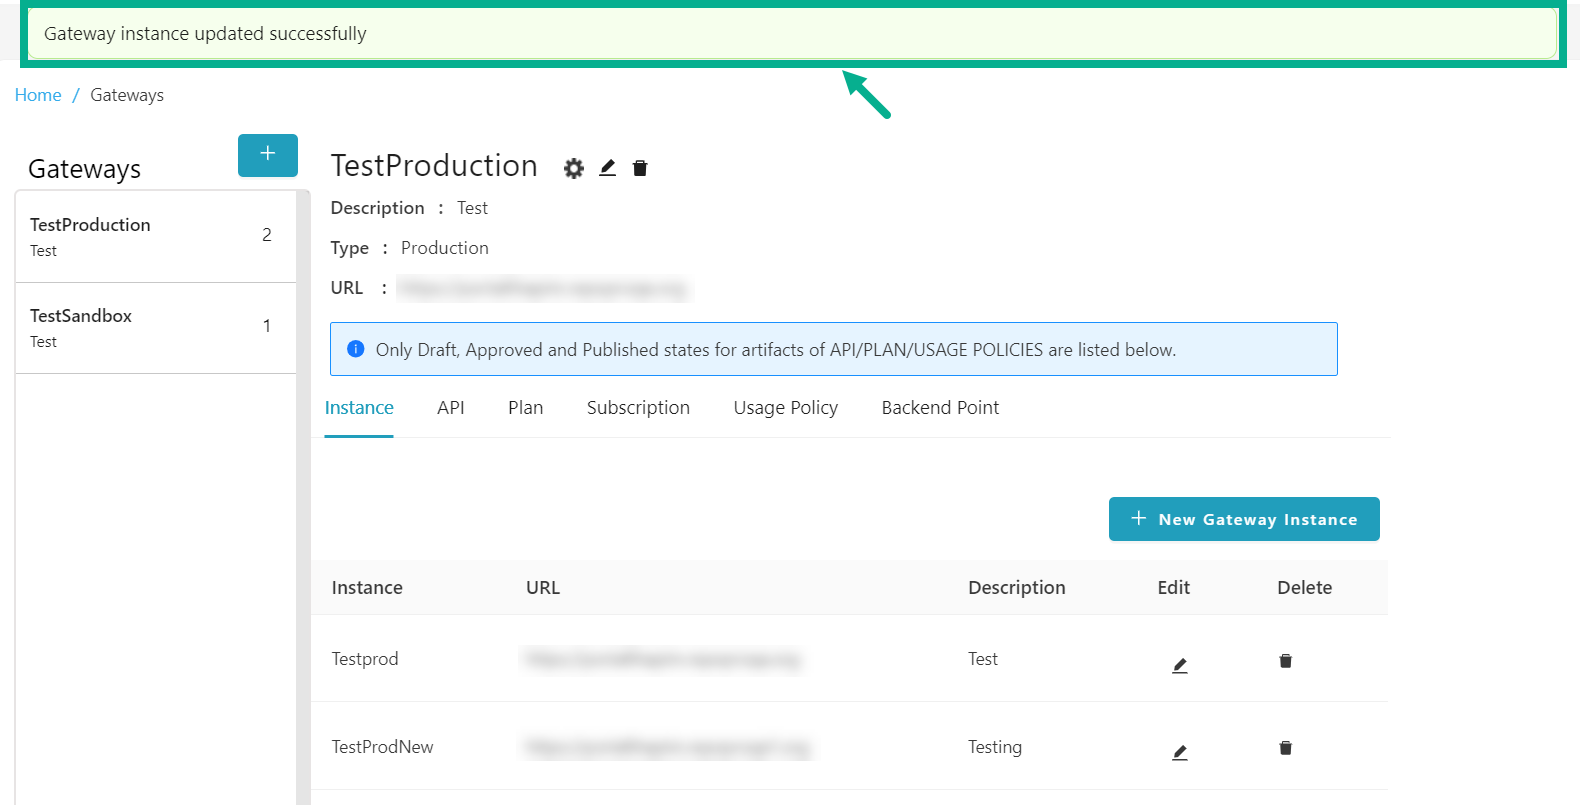
On updating, the confirmation message appears as shown below.
Delete a Gateway Instance
- From the gateway listing page, click to select the gateway.
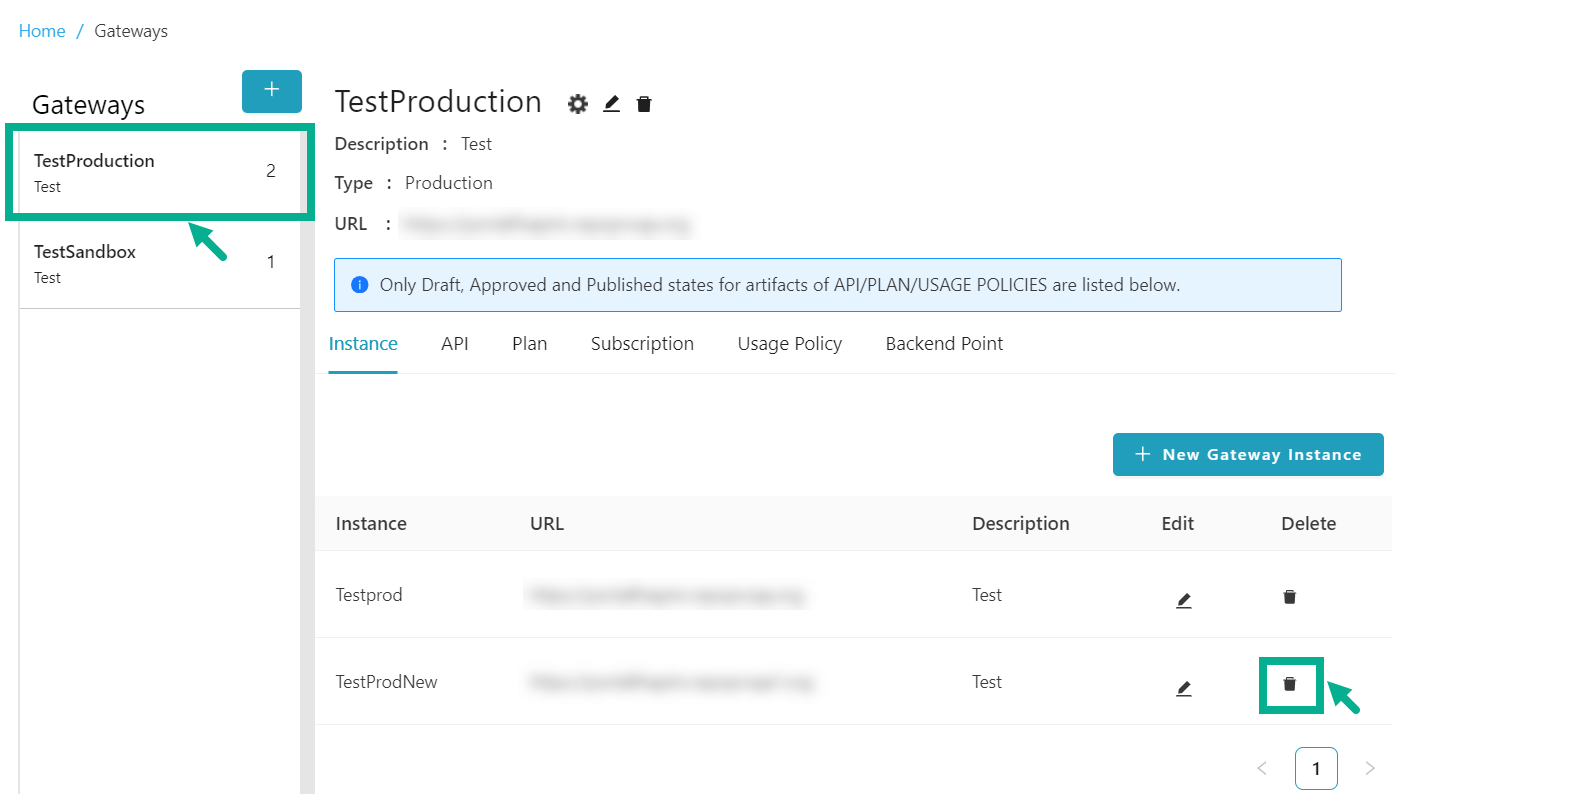
- Click the Delete icon.
Delete Instance dialog box appears as shown below.

- Click Ok.
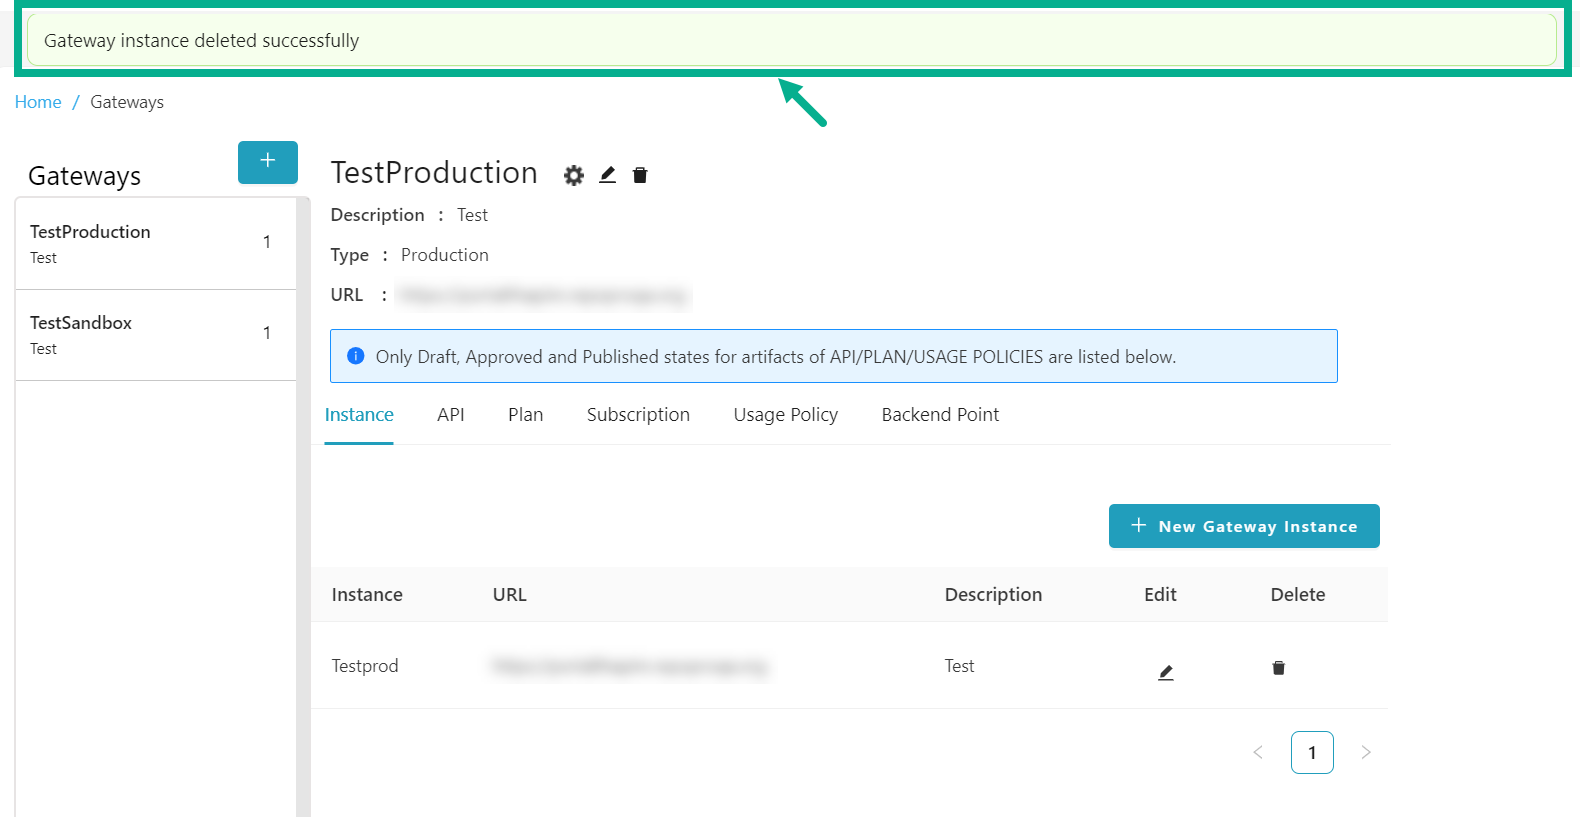
On proceeding, the confirmation message appears as shown below.
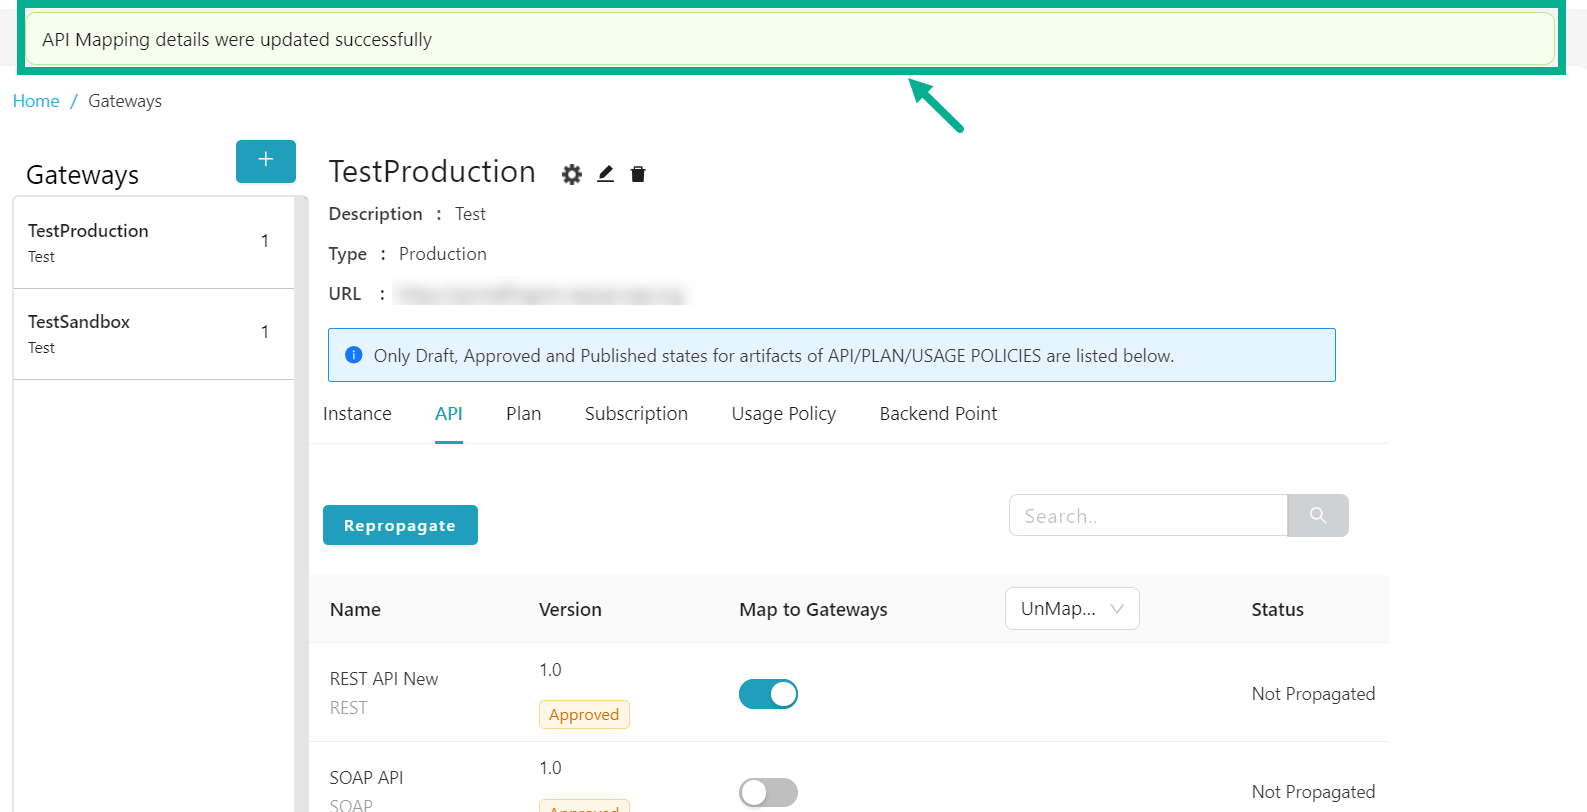
API
The API tab displays a list of all APIs that are in Draft, Approved and Published states.
Map an API version to the Gateway
-
From the gateway listing page, click to select the gateway.
-
Click the API tab.
The API tab displays as shown below.

By default, the Mapped API versions were shown.
- Click and select either the All or Unmapped filters, to find the Unmapped API for Mapping.
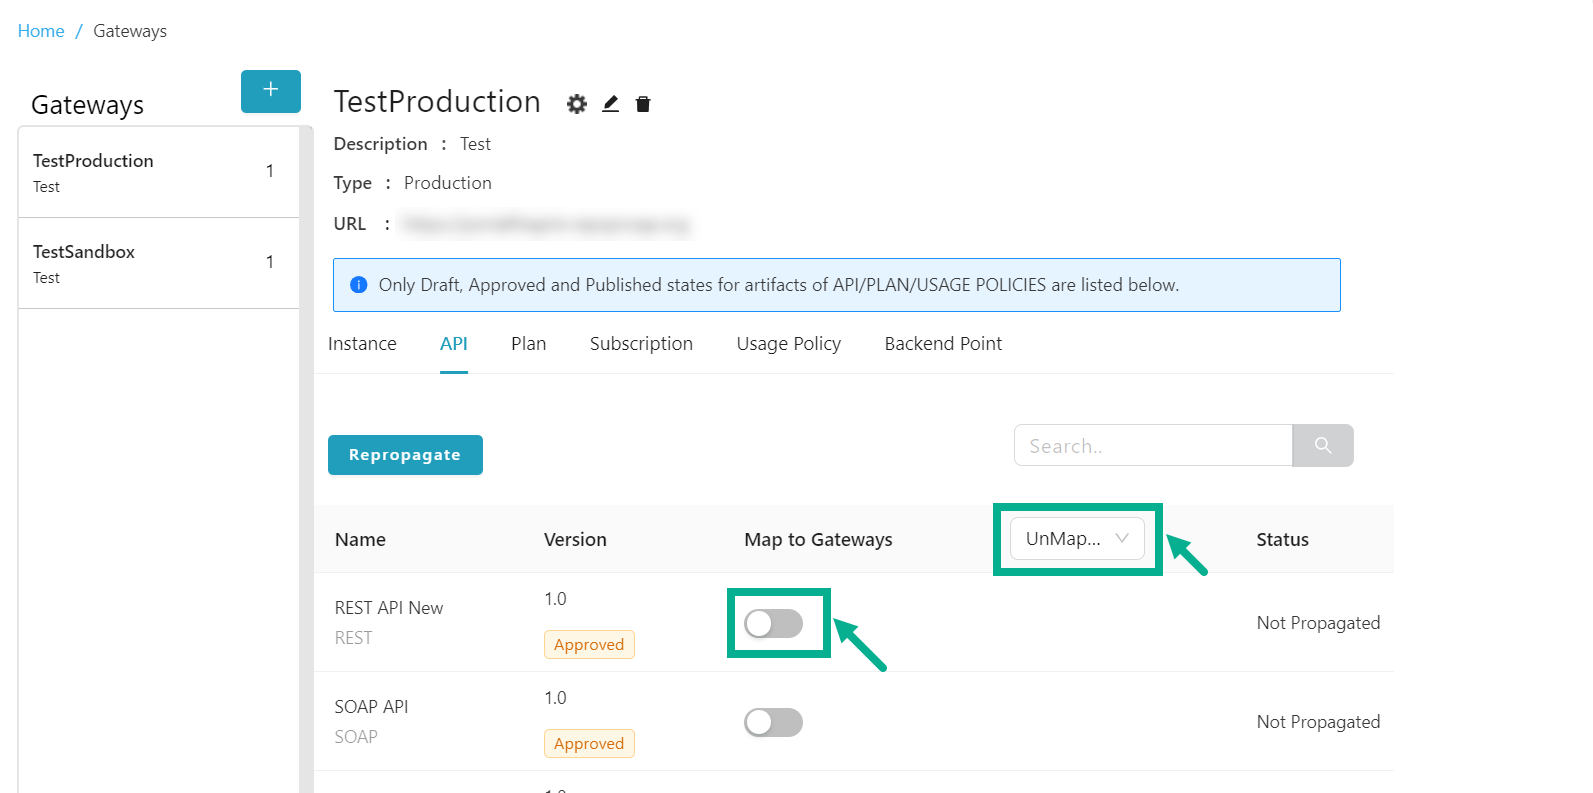
- Enable the Map to Gateways toggle to map the API version with the gateway.
Map to gateway dialog box appears as shown below.
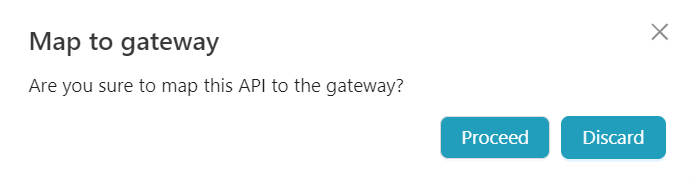
- Click Proceed.
On proceeding, the confirmation message appears as shown below.
Unmap an API version from the Gateway
Gateway mapped APIs that are used in a plan cannot be unmapped.
-
From the gateway listing page, click to select the gateway.
-
Click the API tab.
The API tab displays as shown below.
By default, the Mapped API versions were shown.
- Click and select either the All or Mapped filters, to find the Mapped API for Unmapping.
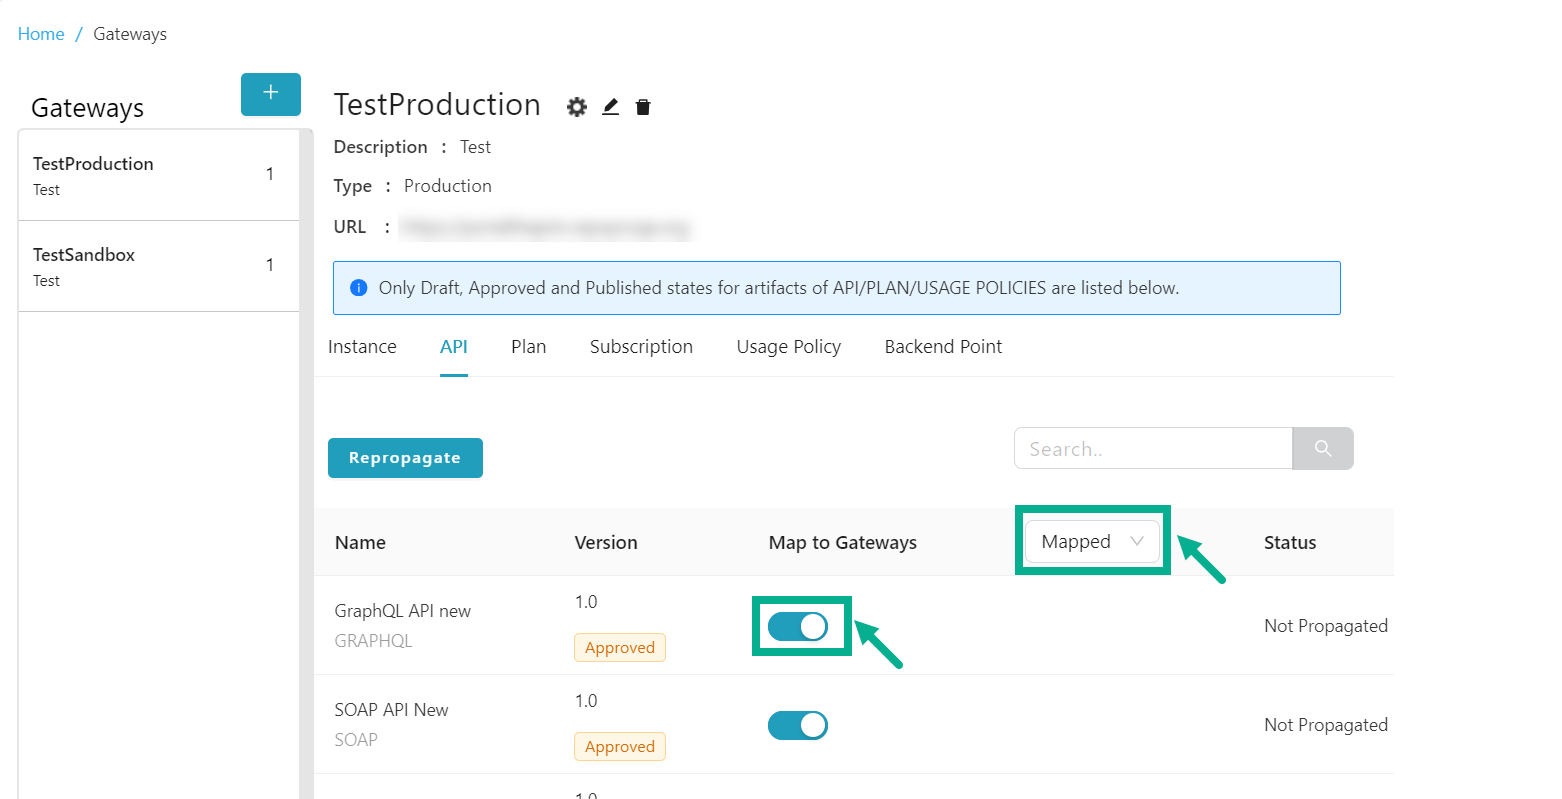
- Disable the Map to Gateways toggle to unmap the API version from the gateway.
Unmap to gateway dialog box appears as shown below.
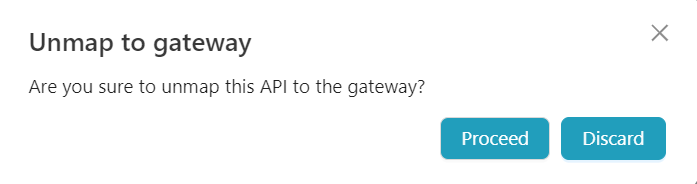
- Click Proceed.
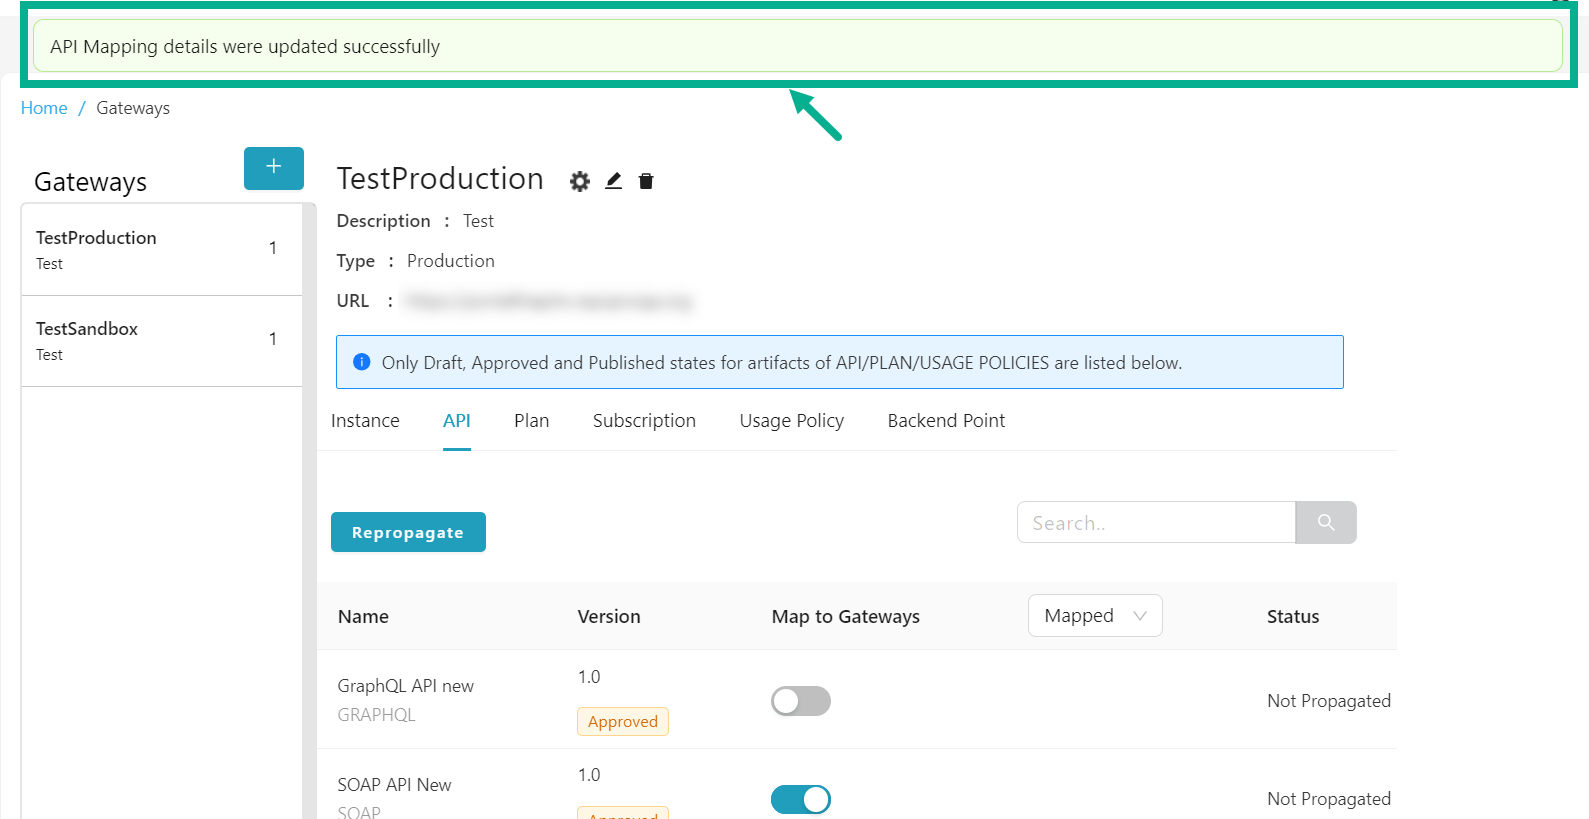
On proceeding, the confirmation message appears as shown below.
Repropagate the propagated API versions
-
From the gateway listing page, click to select the gateway.
-
Click the API tab.
The API tab displays as shown below.
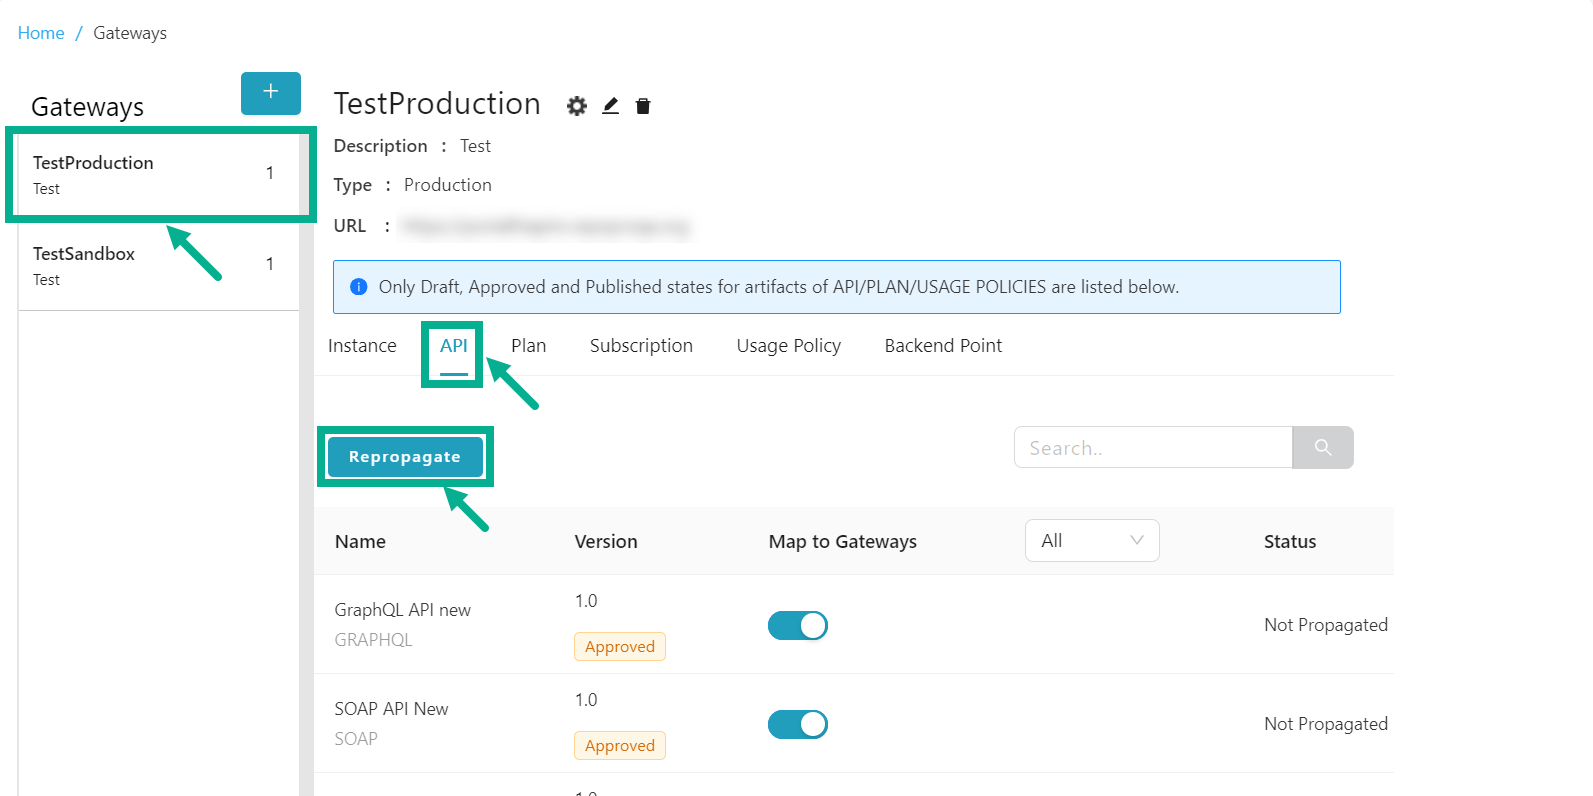
- Click Repropagate.
Propagate API dialog box appears as shown below.
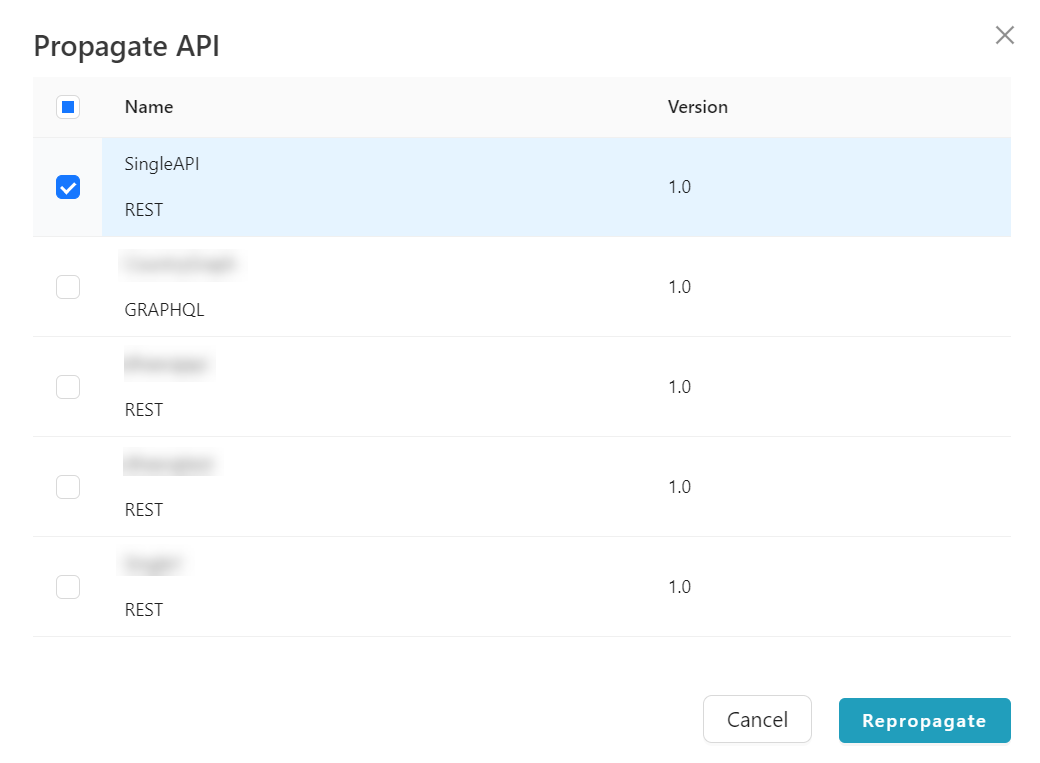
-
Select the API Version by clicking the appropriate checkboxes.
-
Click Repropagate.
On proceeding, the confirmation message appears as shown below.

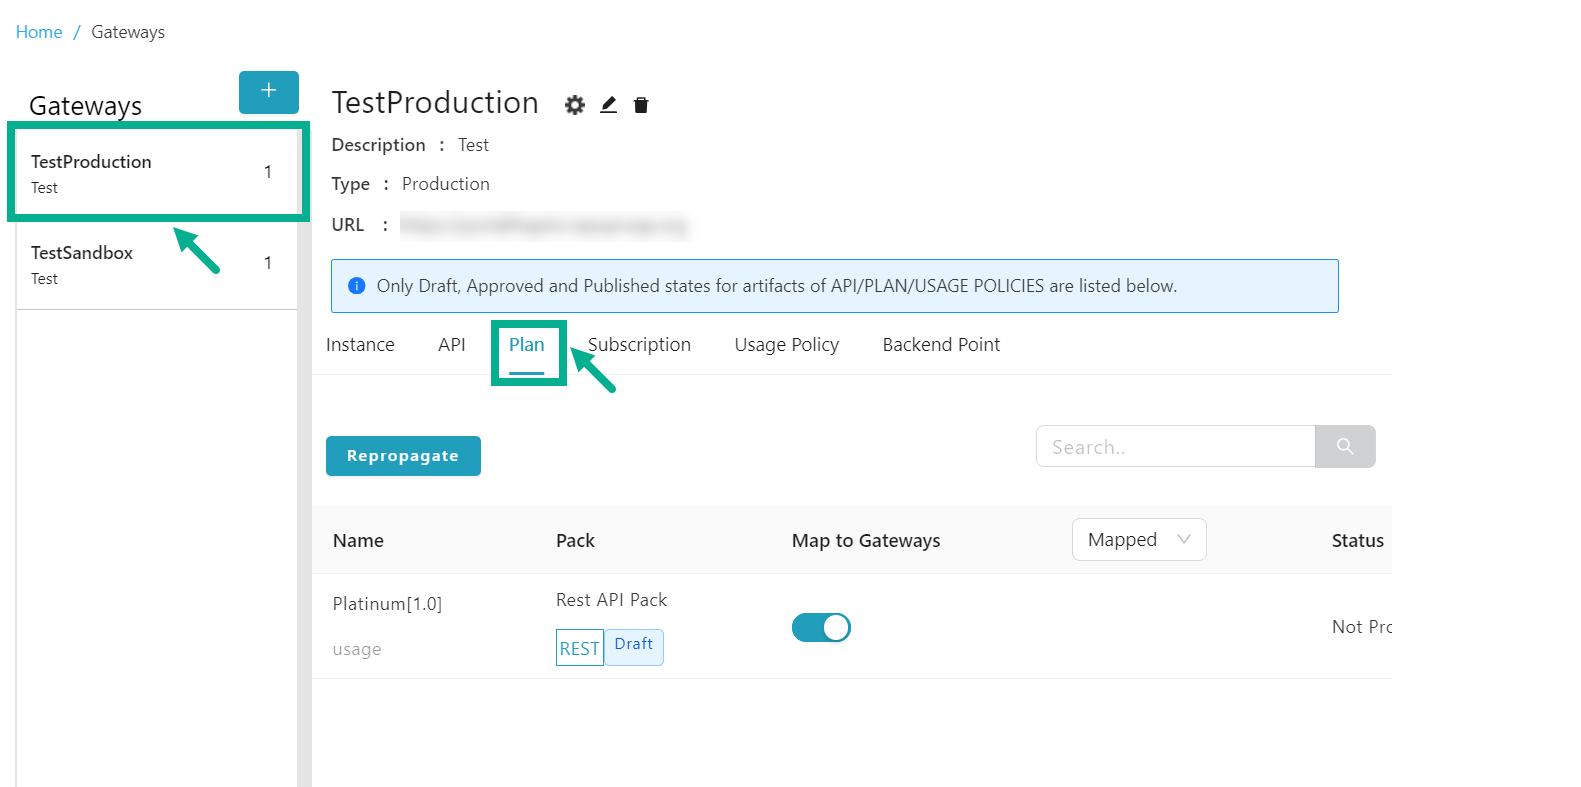
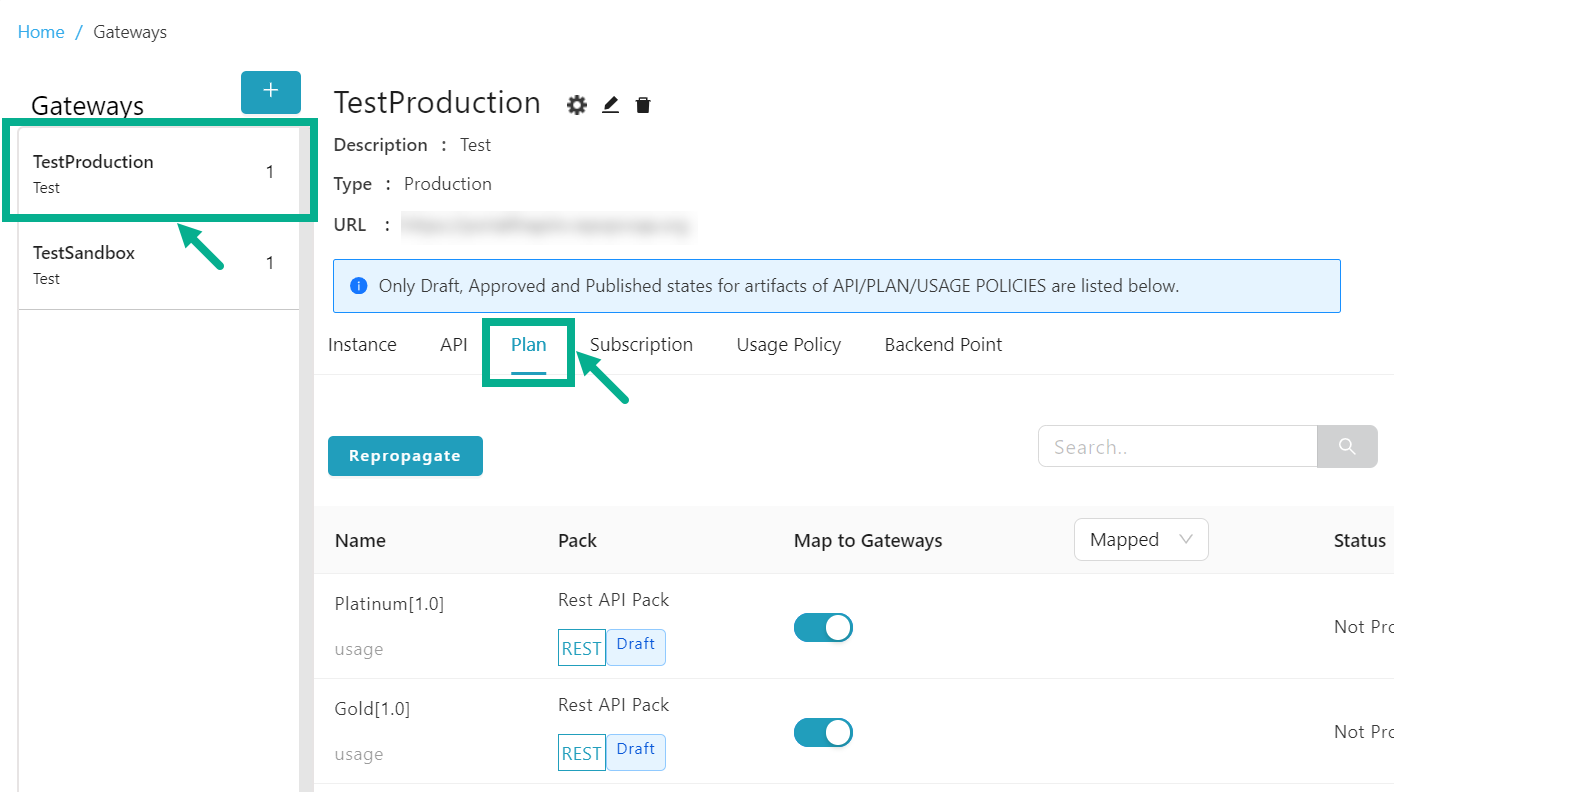
Plan
The Plan tab displays a list of all plans that are in Draft, Approved and Published states.
Map a Plan to the Gateway
-
From the gateway listing page, click to select the gateway.
-
Click the Plan tab.
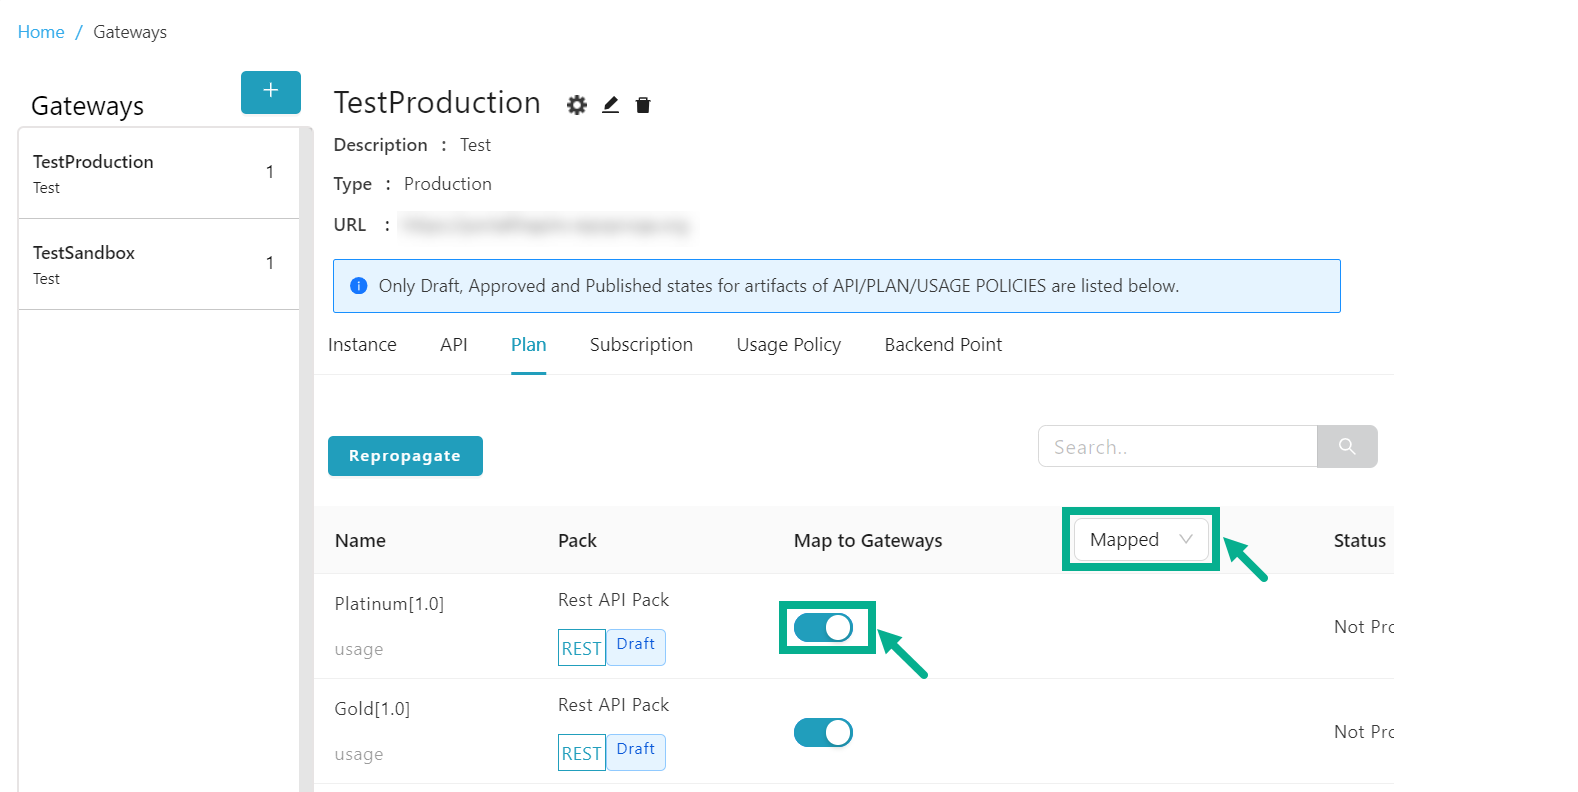
The Plan tab displays as shown below.
By default, the Mapped plans were shown.
- Click and select either the All or Unmapped filters, to find the Unmapped Plans for Mapping.

- Enable the Map to Gateways toggle to map the Plan to the gateway.
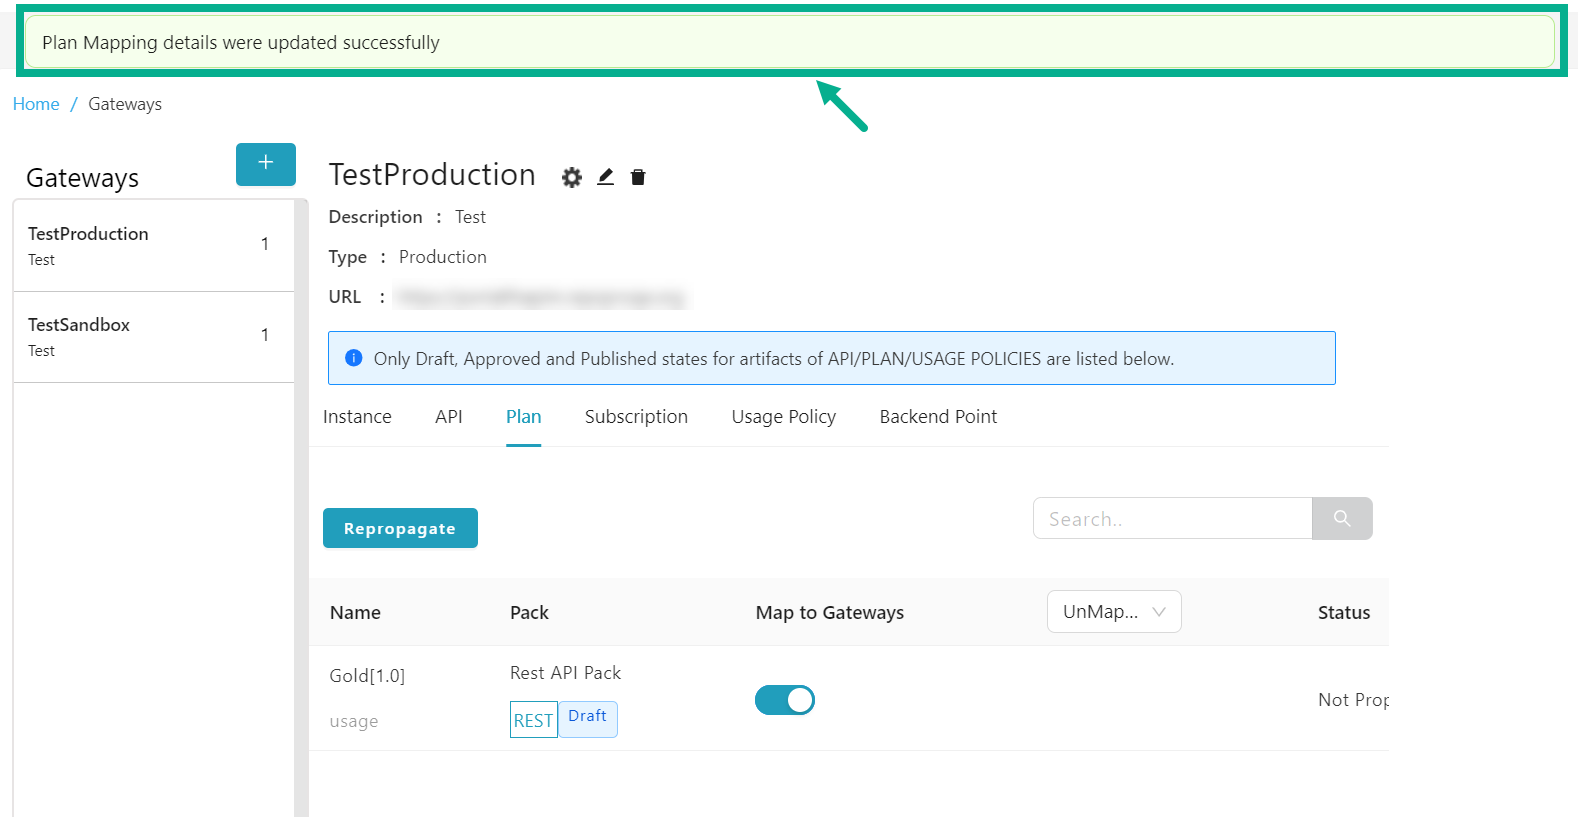
On proceeding, the confirmation message appears as shown below.
Unmap a Plan from the Gateway
Gateway-mapped plans with active subscriptions cannot be unmapped.
-
From the gateway listing page, click to select the gateway.
-
Click the Plan tab.
The Plan tab displays as shown below.
By default, the Mapped plans were shown.
- Click and select either the All or Mapped filters, to find the Mapped plans for Unmapping.
- Disable the Map to Gateways toggle to unmap the plan from the gateway.
On proceeding, the confirmation message appears as shown below.

Repropagate the propagated Plans
-
From the gateway listing page, click to select the gateway.
-
Click the Plan tab.
The Plan tab displays as shown below.
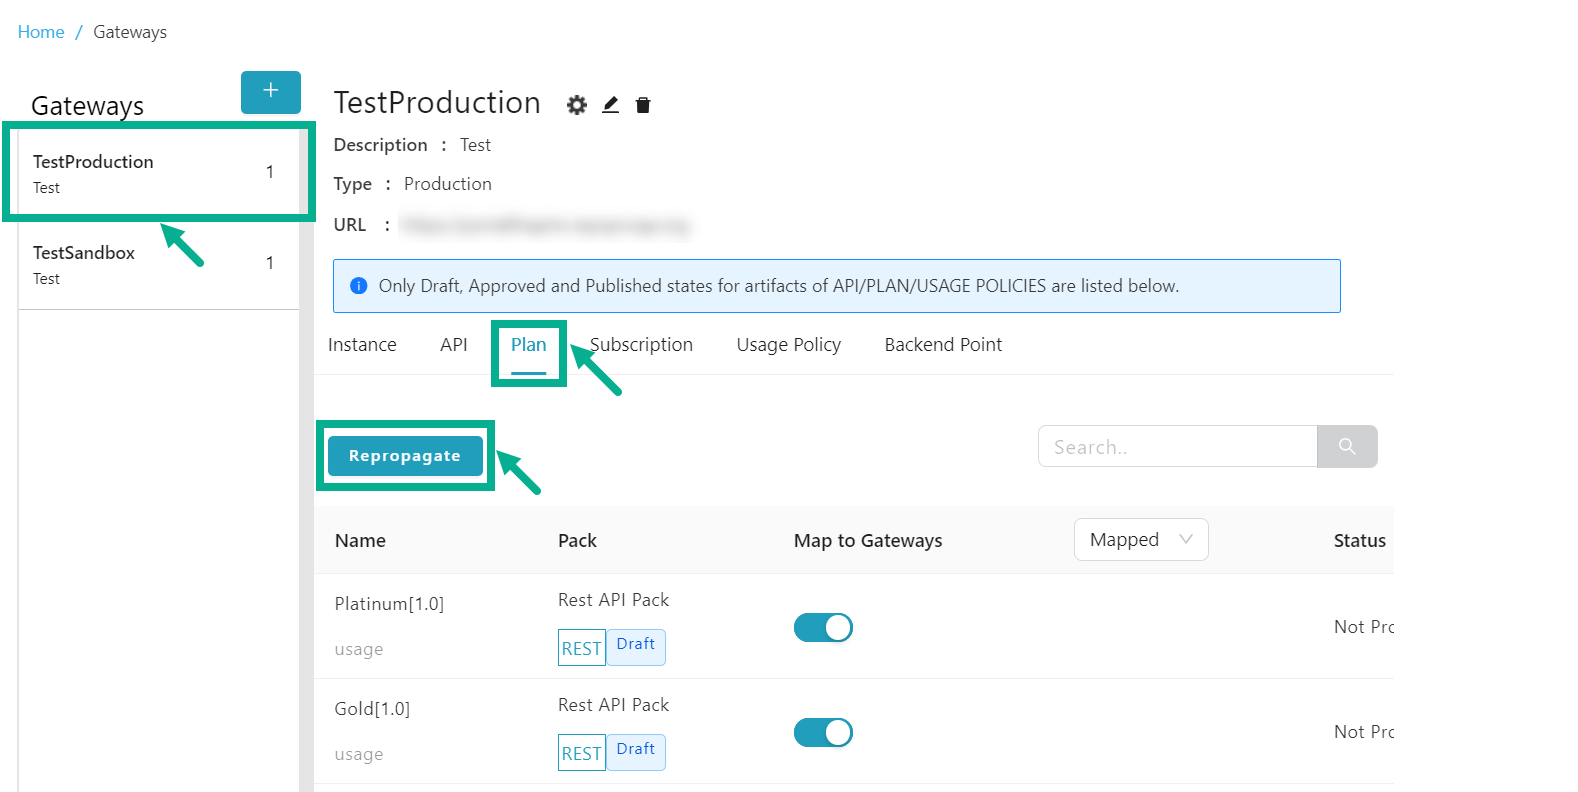
- Click Repropagate.
Propagate Plan dialog box appears as shown below.
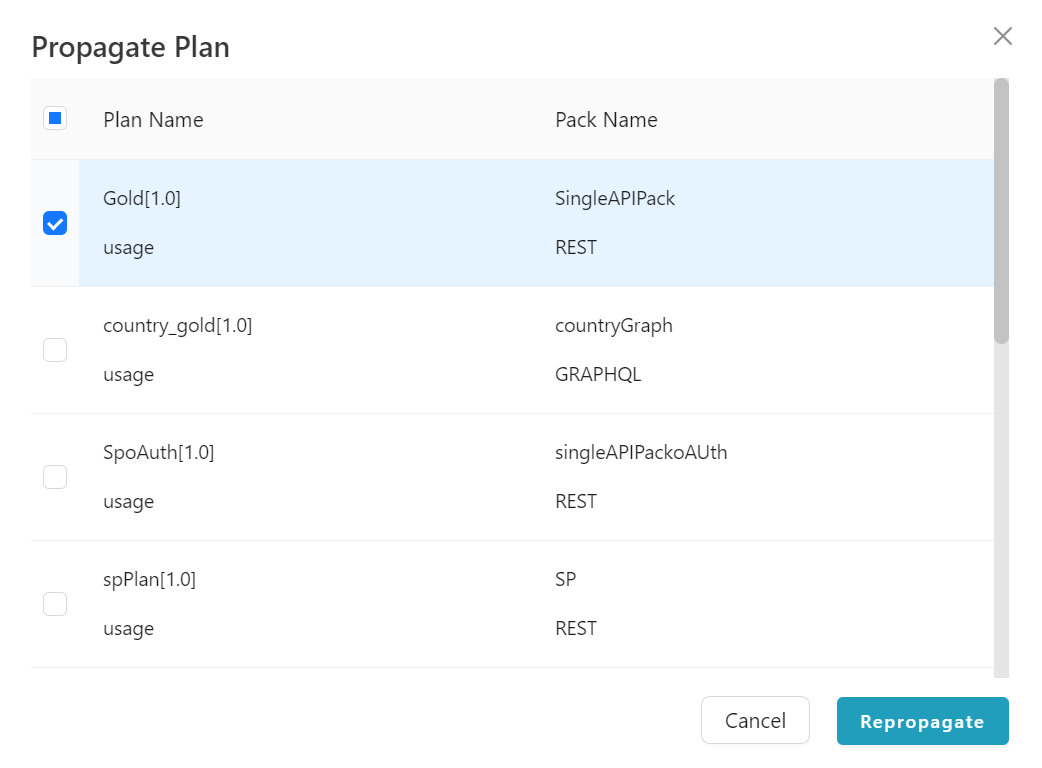
-
Select the Plan Name by clicking the appropriate checkboxes.
-
Click Repropagate.
On proceeding, the confirmation message appears as shown below.

Subscription
The Subscription tab displays all the mapped subscriptions to the specific Gateway.
Repropagate the propagated Subscriptions
-
From the gateway listing page, click to select the gateway.
-
Click the Subscription tab.
The Subscription tab displays as shown below.
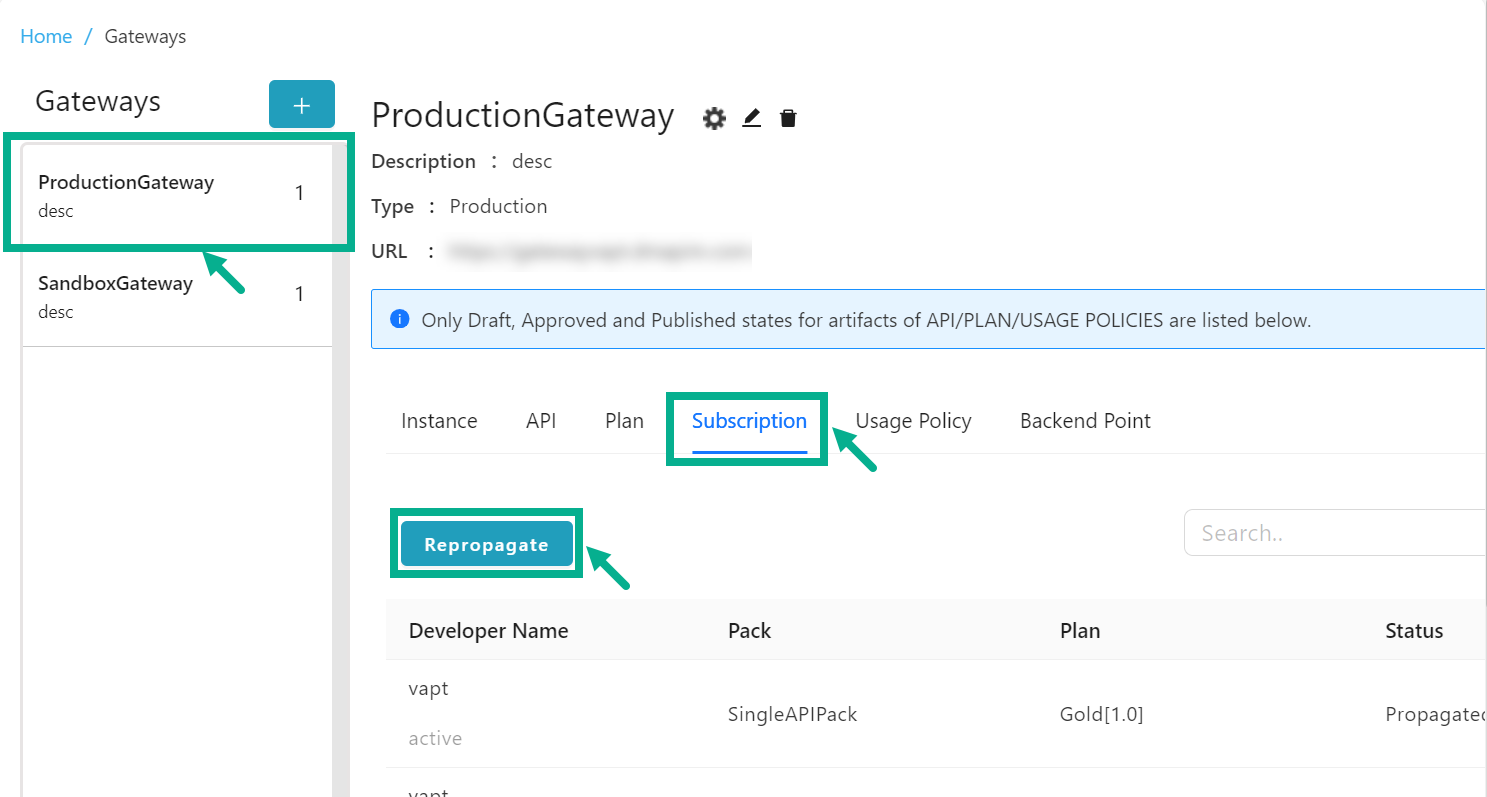
- Click Repropagate.
Propagate Subscription dialog box appears as shown below.
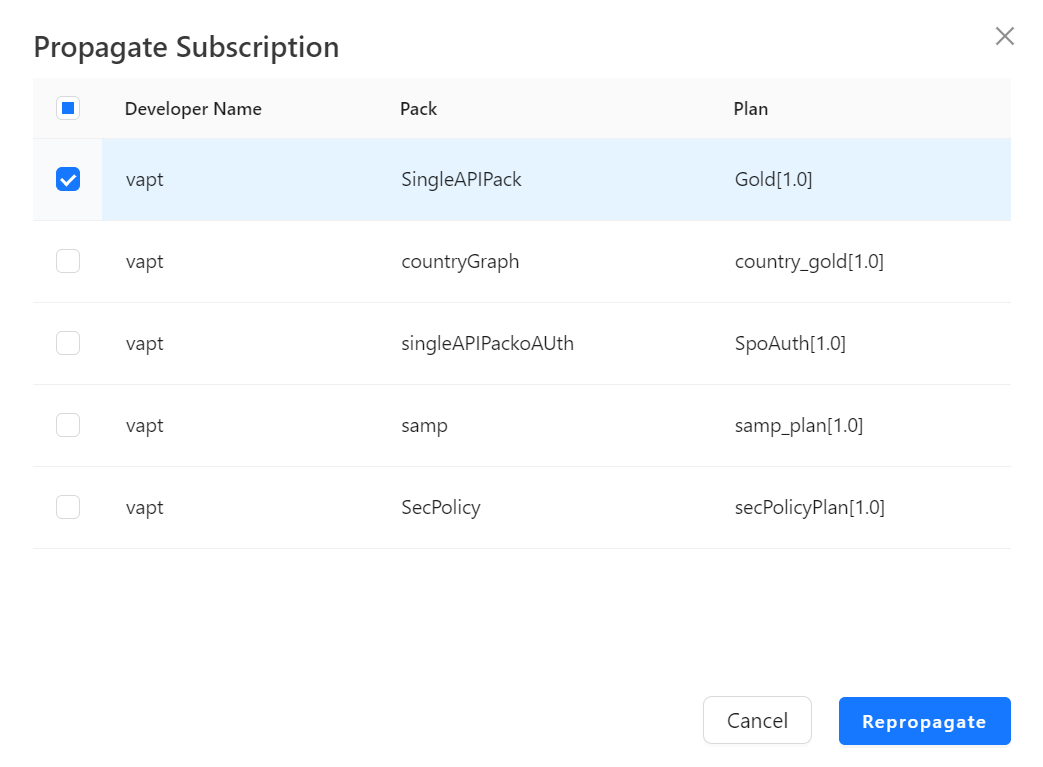
-
Select the subscription by clicking the appropriate checkboxes.
-
Click Repropagate.
On proceeding, the confirmation message appears as shown below.

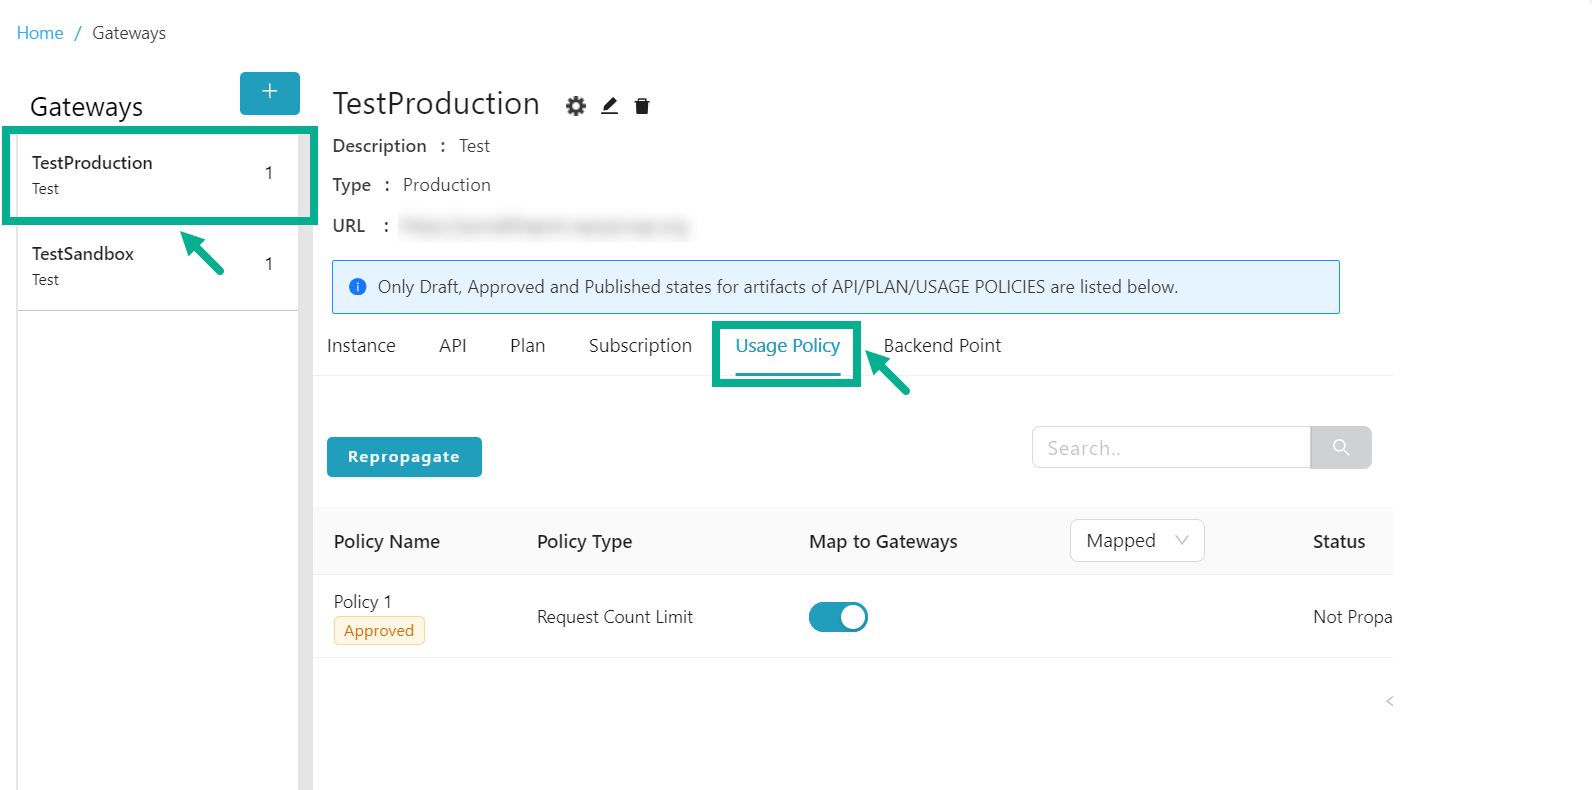
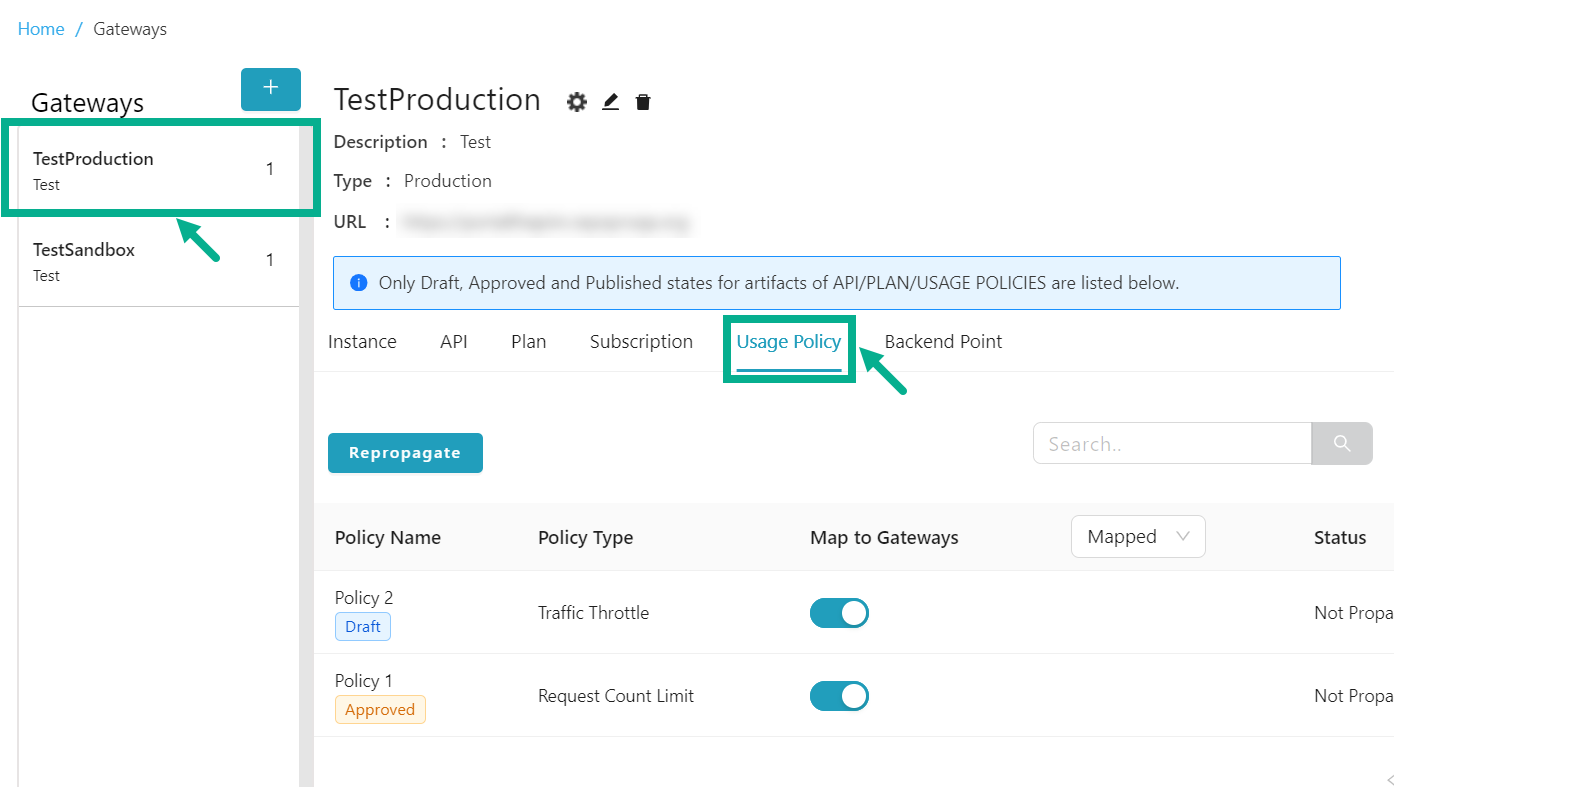
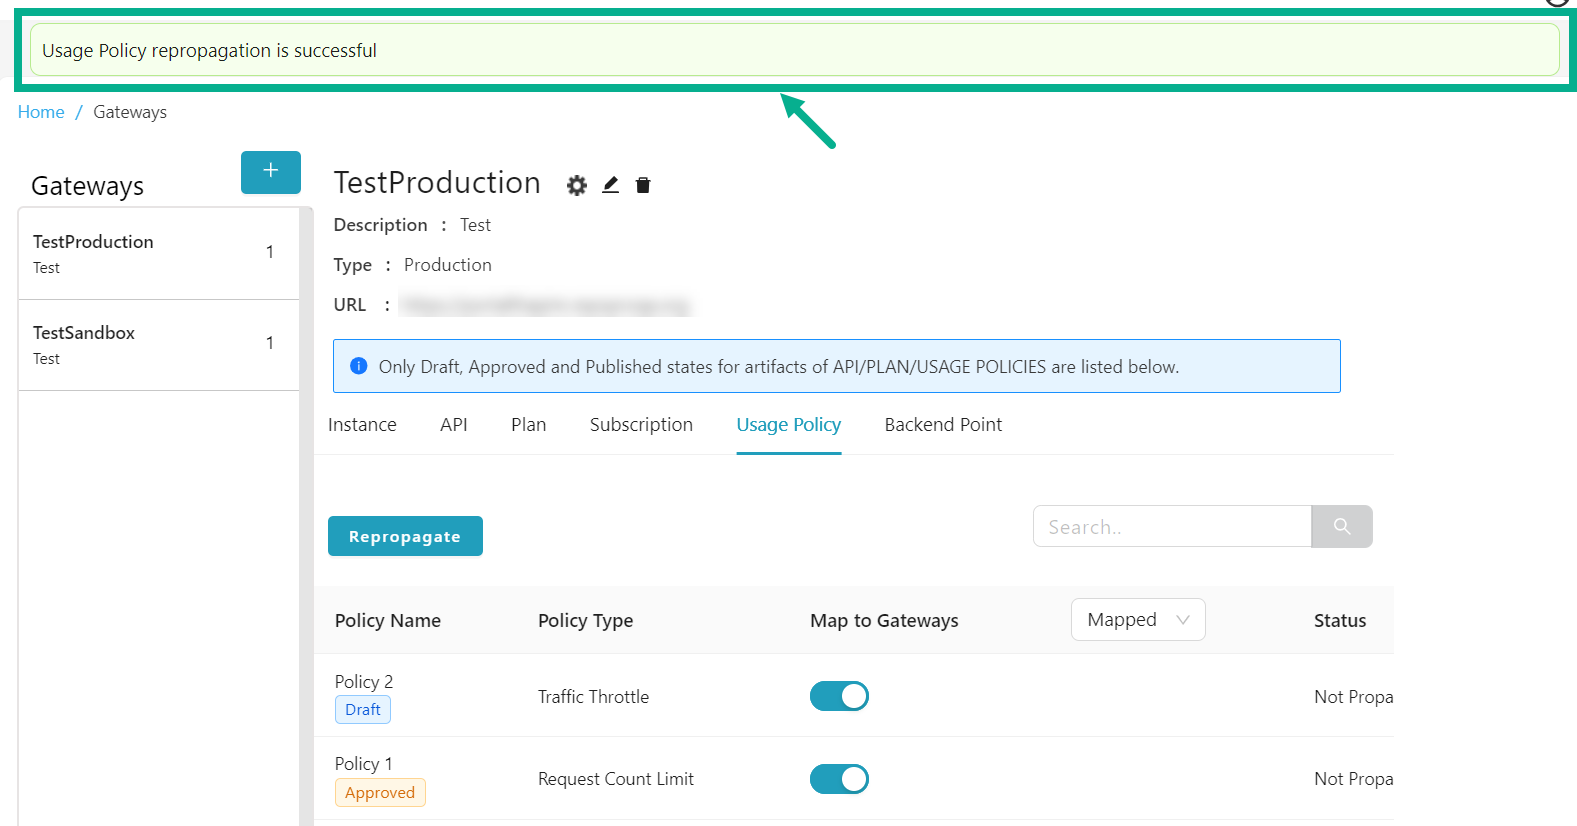
Usage Policy
The Usage Policy tab displays a list of all usage policies that are in Draft, Approved and Published states.
Map a Usage Policy to the Gateway
-
From the gateway listing page, click to select the gateway.
-
Click the Usage Policy tab.
The Usage Policy tab displays as shown below.
By default, the Mapped Usage Policies were shown.
- Click and select either the All or Unmapped filters, to find the Unmapped Usage Policy for Mapping.
- Enable the Map to Gateways toggle to map the usage policy to the gateway.
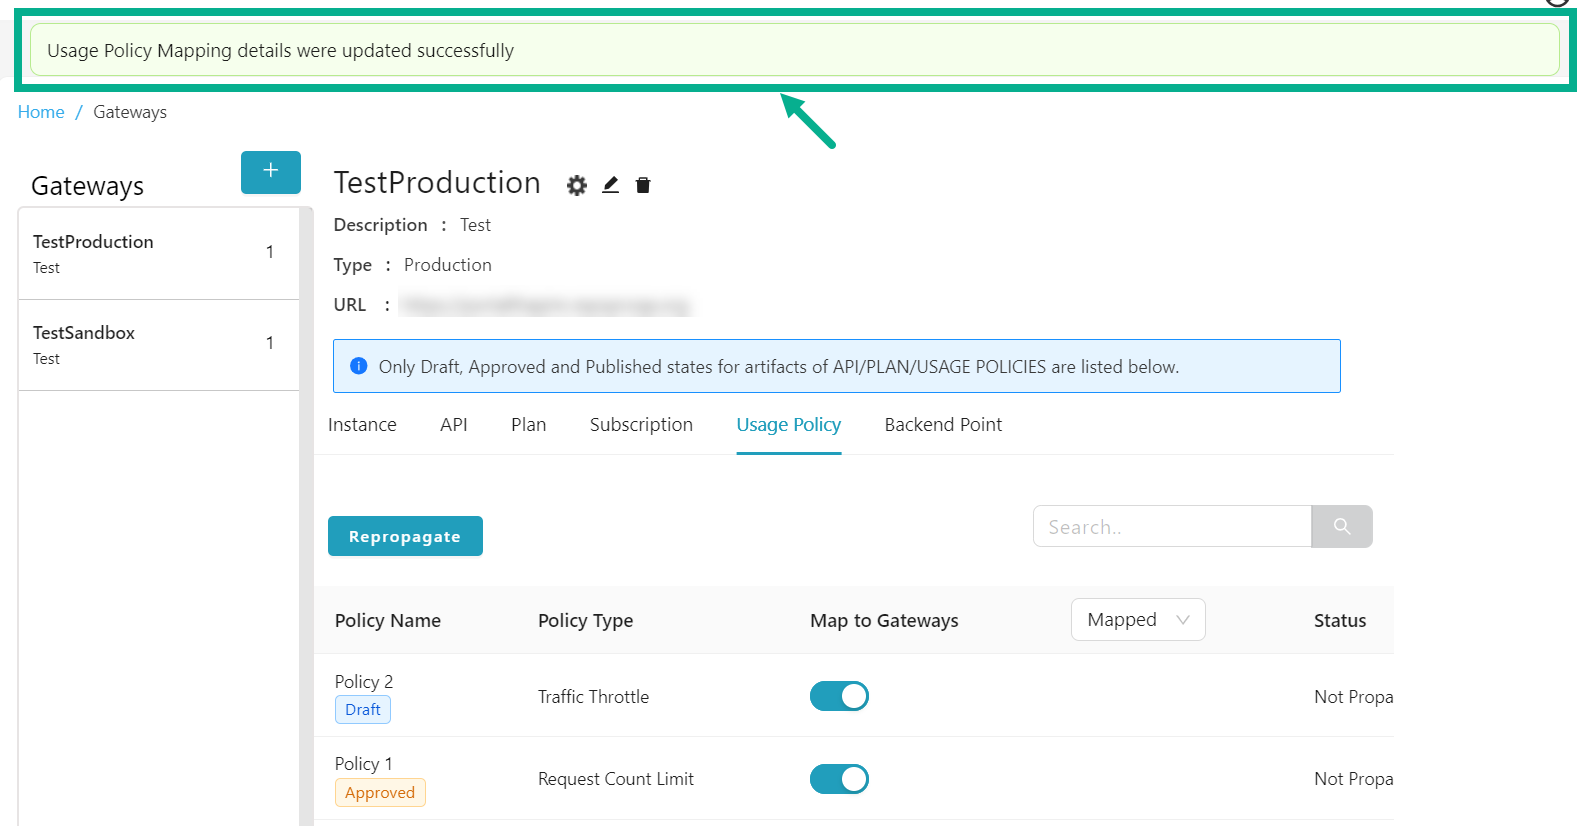
On proceeding, the confirmation message appears as shown below.

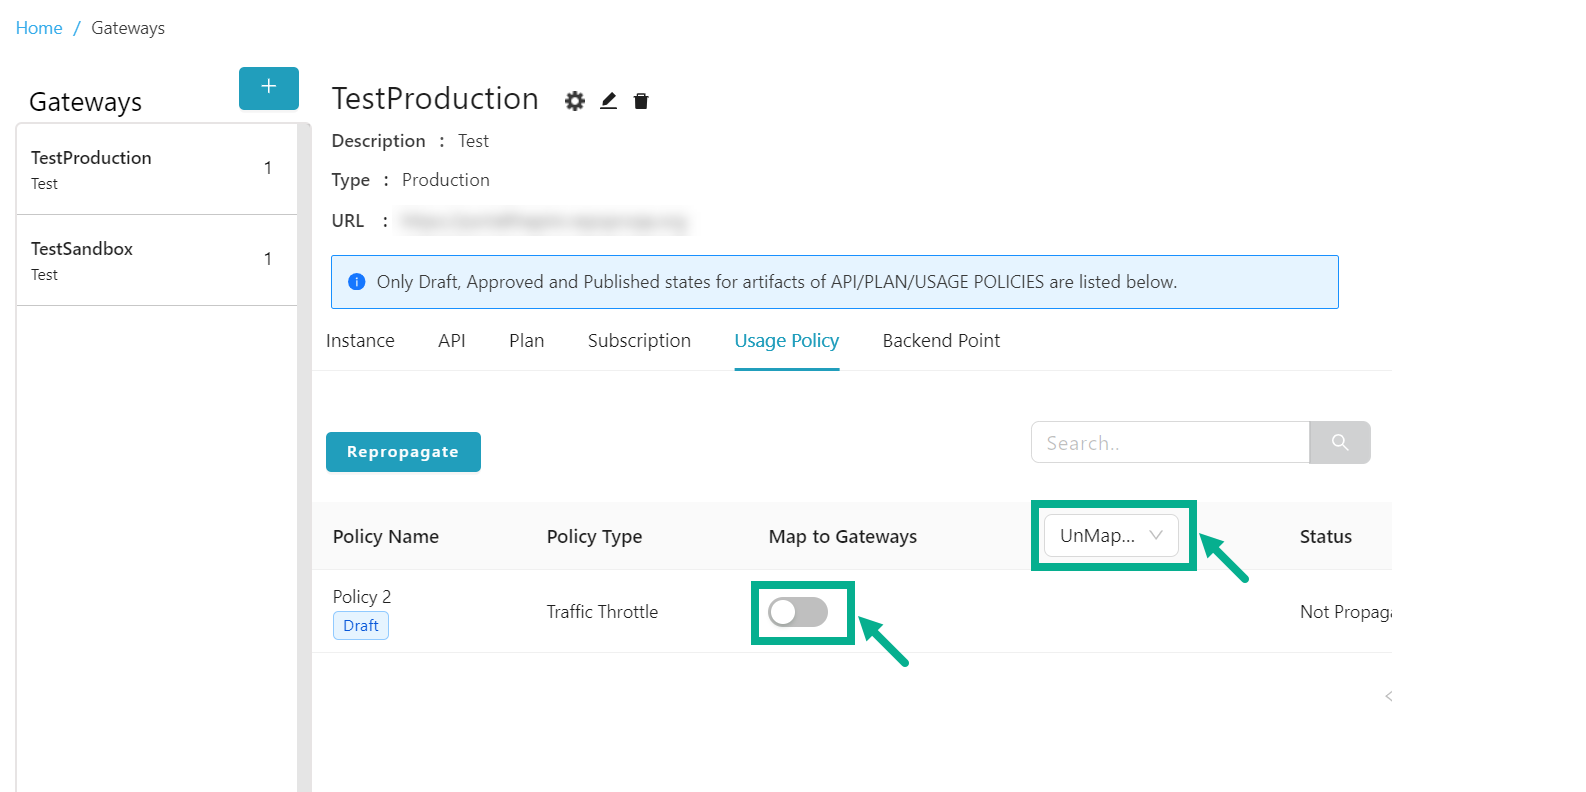
Unmap a Usage Policy from the Gateway
Gateway mapped Usage policies that are used in a plan with an active subscription cannot be unmapped.
-
From the gateway listing page, click to select the gateway.
-
Click the Usage Policy tab.
The Usage Policy tab displays as shown below.
By default, the Mapped Usage policies were shown.
- Click and select either the All or Mapped filters, to find the Mapped usage policy for Unmapping.
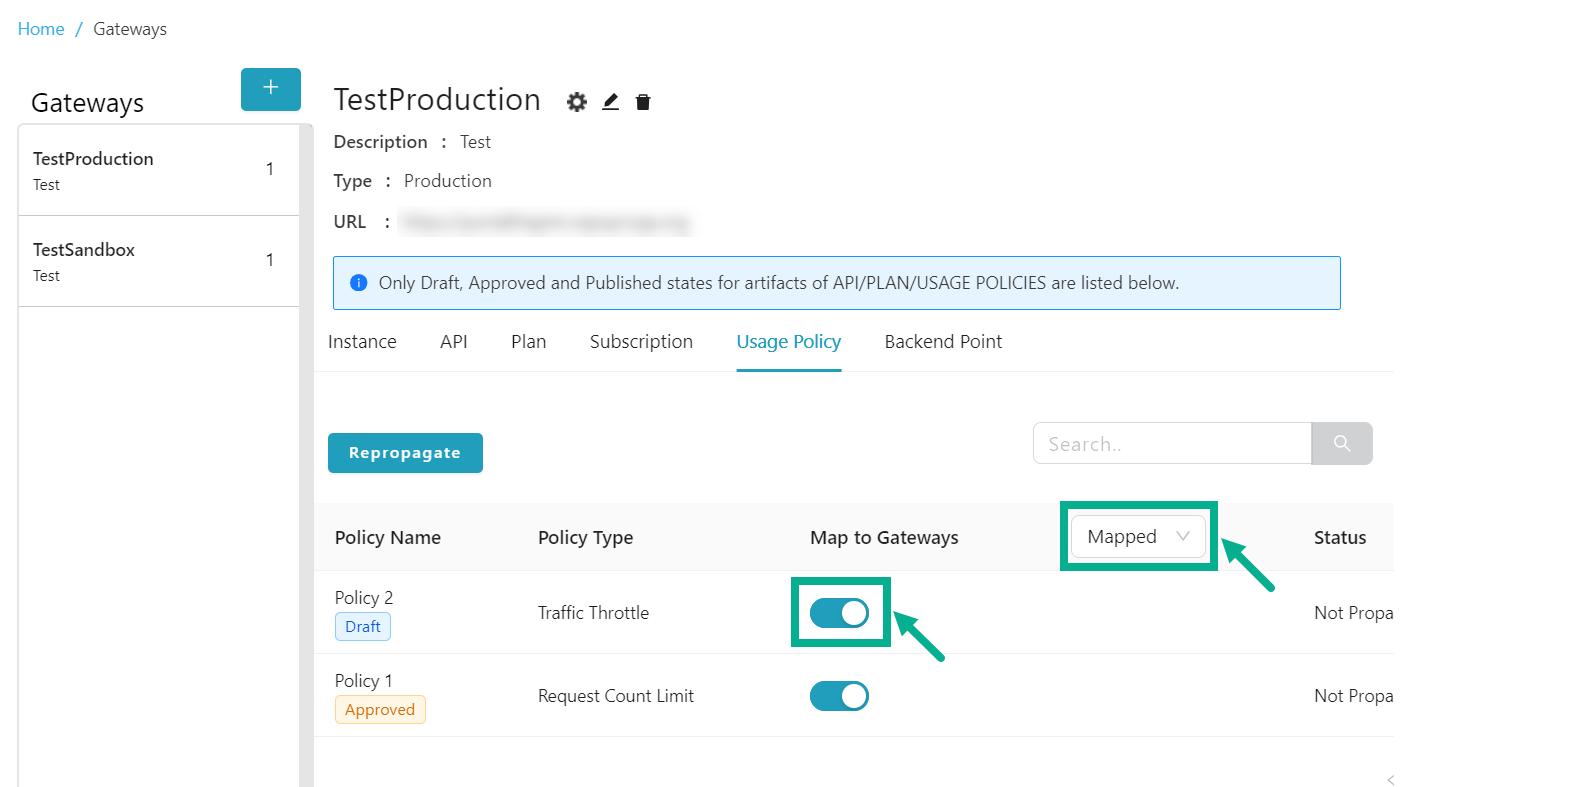
- Disable the Map to Gateways toggle to unmap the usage policy from the gateway.
On proceeding, the confirmation message appears as shown below.
Repropagate the propagated Usage Policy
-
From the gateway listing page, click to select the gateway.
-
Click the Usage Policy tab.
The Usage Policy tab displays as shown below.
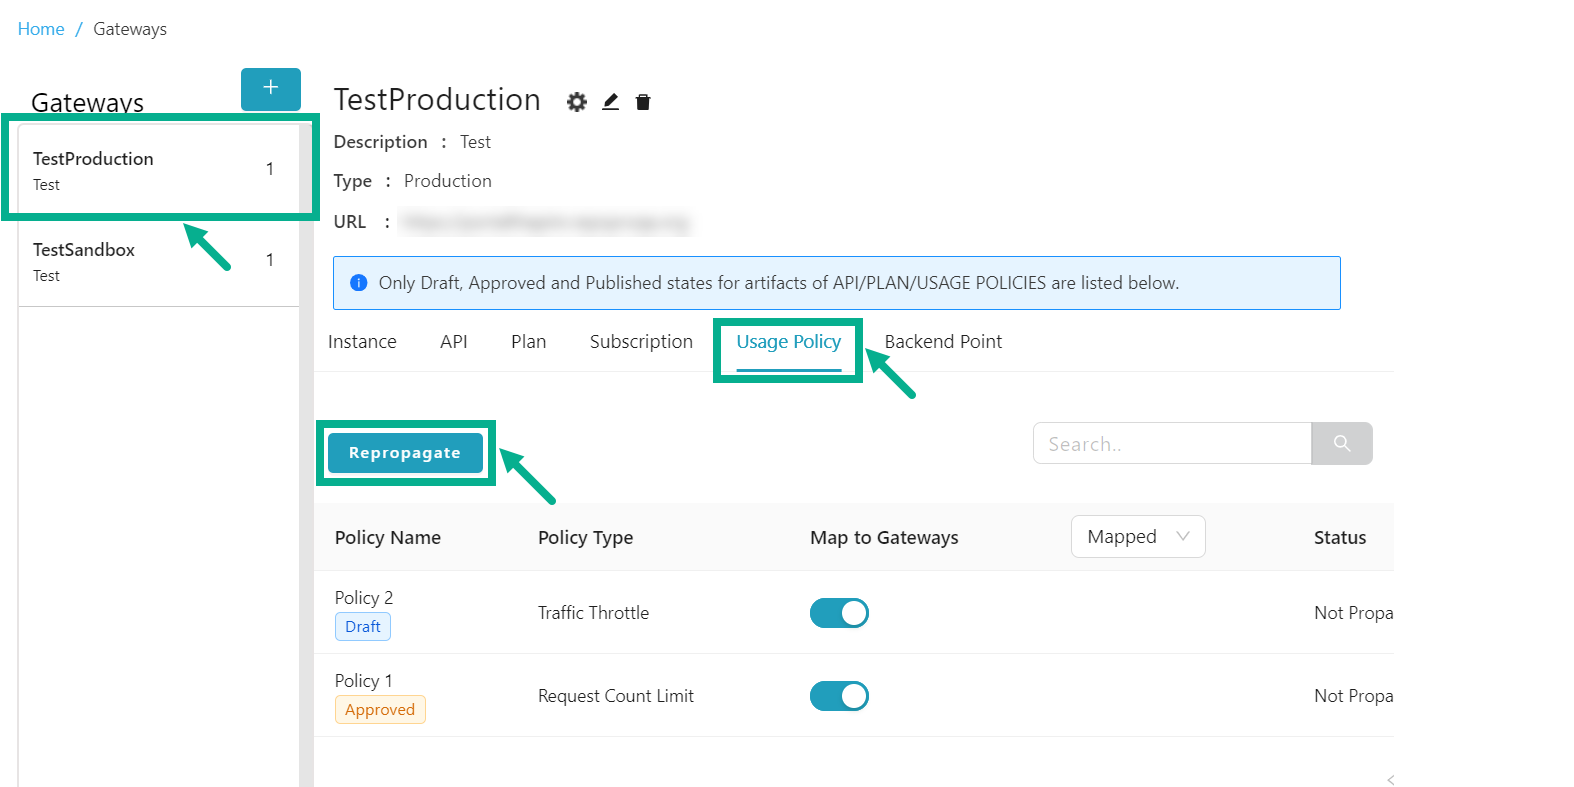
- Click Repropagate.
Propagate Usage Policy dialog box appears as shown below.
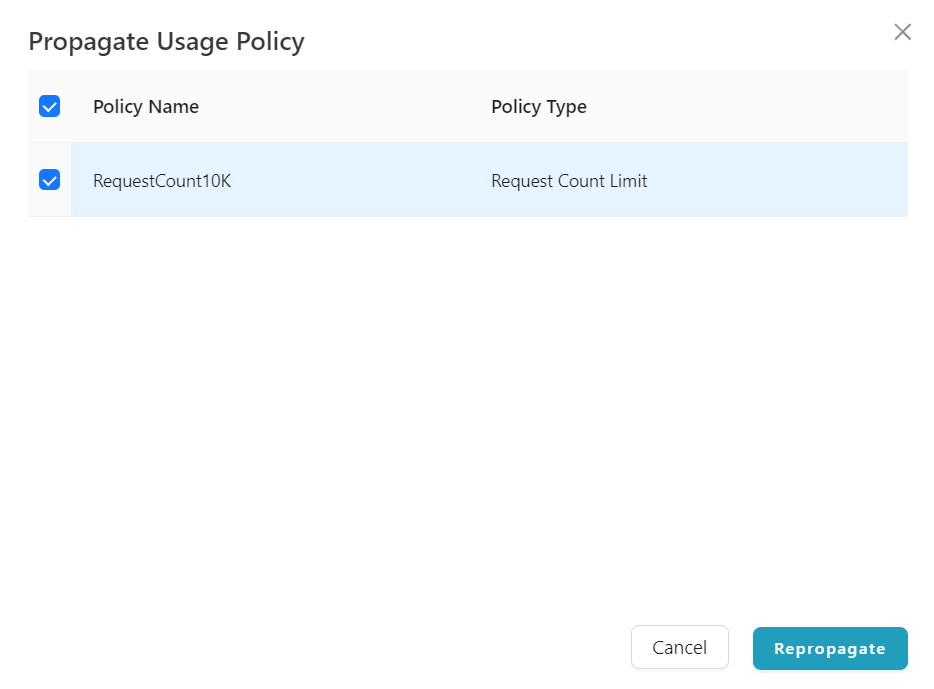
-
Select the Policy Name by clicking the appropriate checkboxes.
-
Click Repropagate.
On proceeding, the confirmation message appears as shown below.
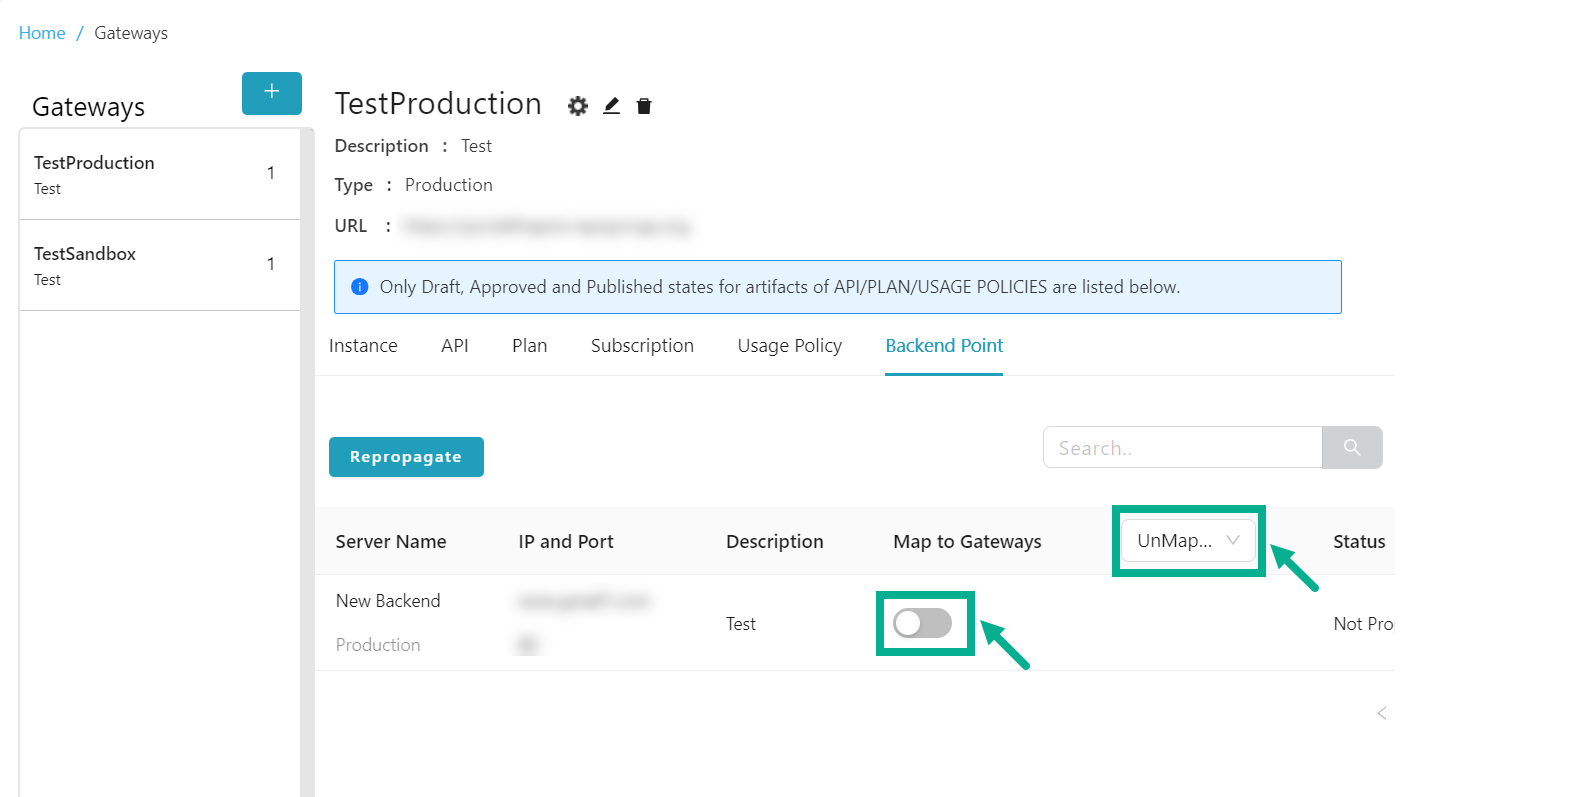
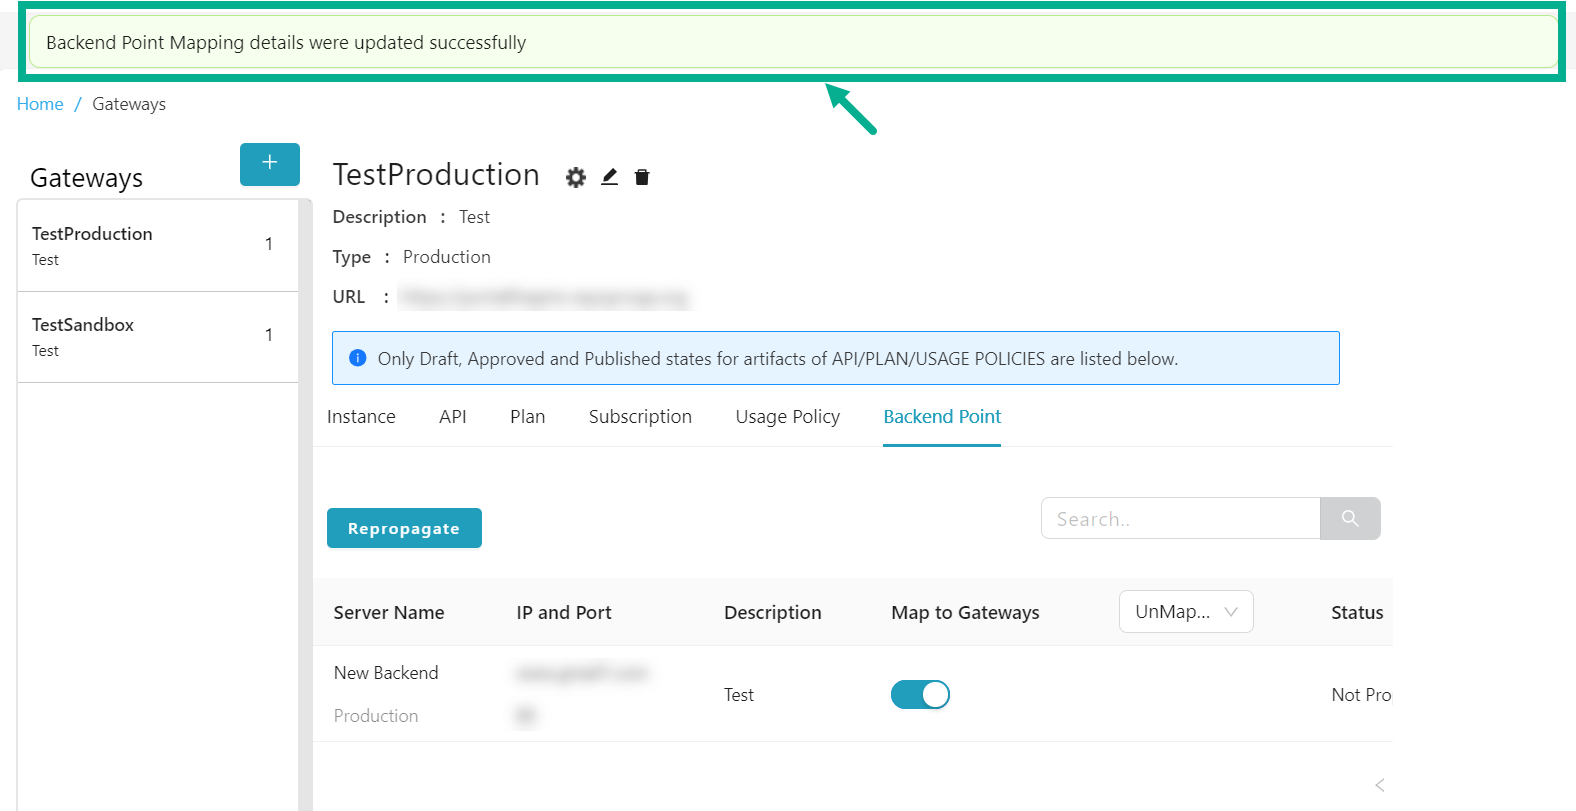
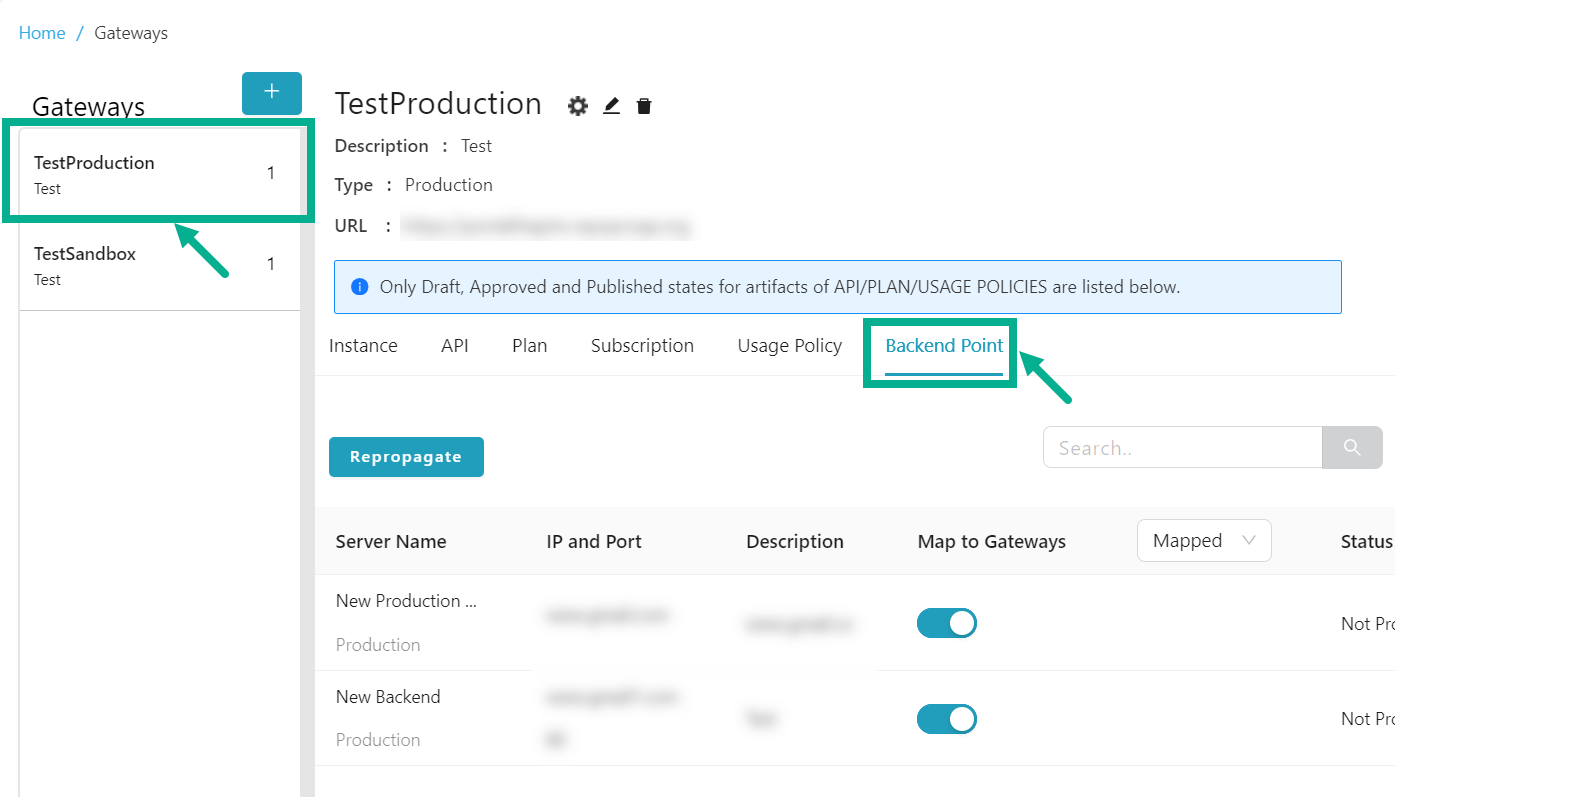
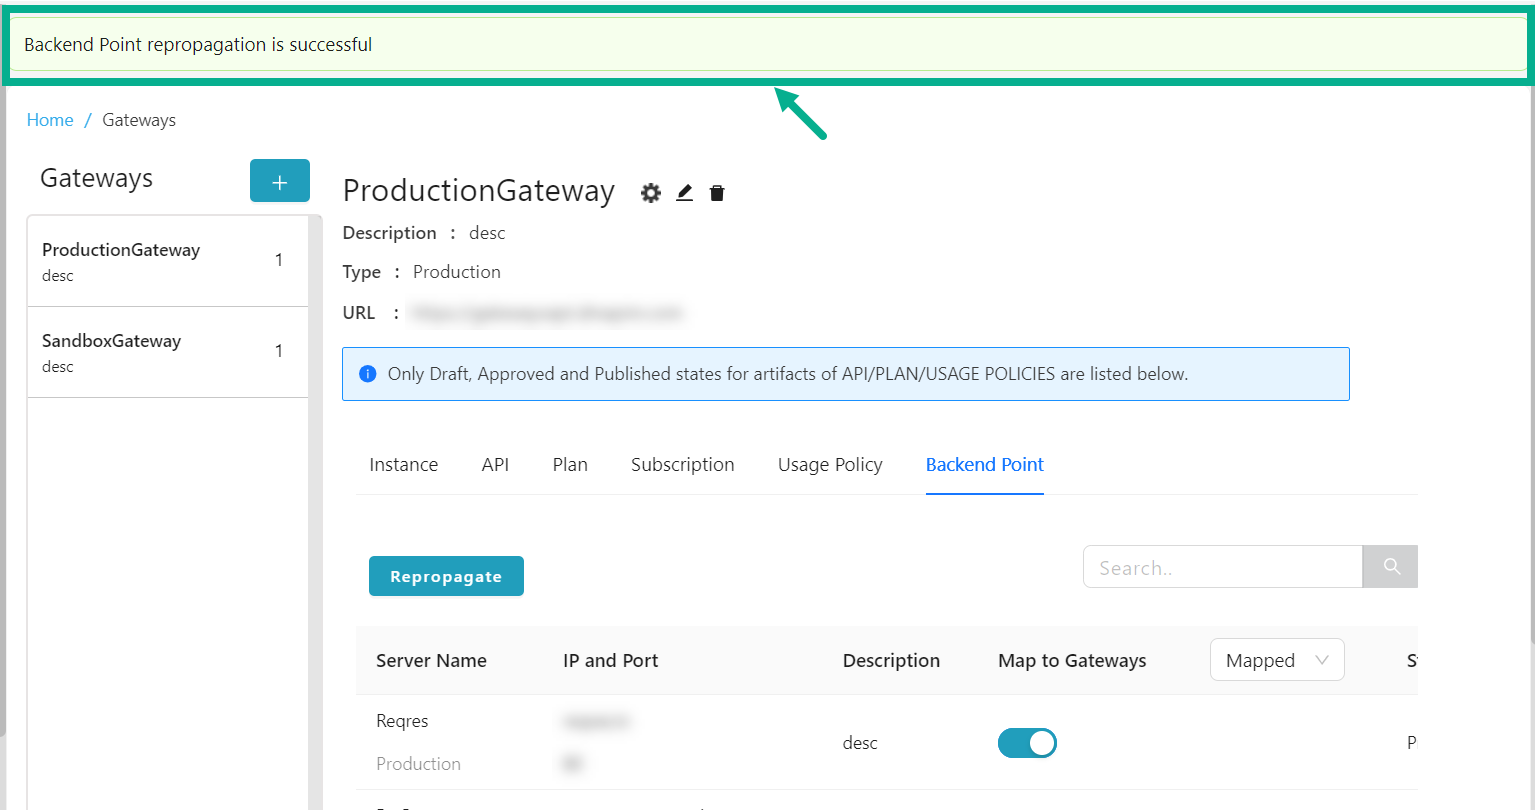
Backend Point
The Backend Point tab lists all the Backends associated with the specific Gateway.
Map a Backend Point to the Gateway
-
From the gateway listing page, click to select the gateway.
-
Click the Backend Point tab.
The Backend Point tab displays as shown below.

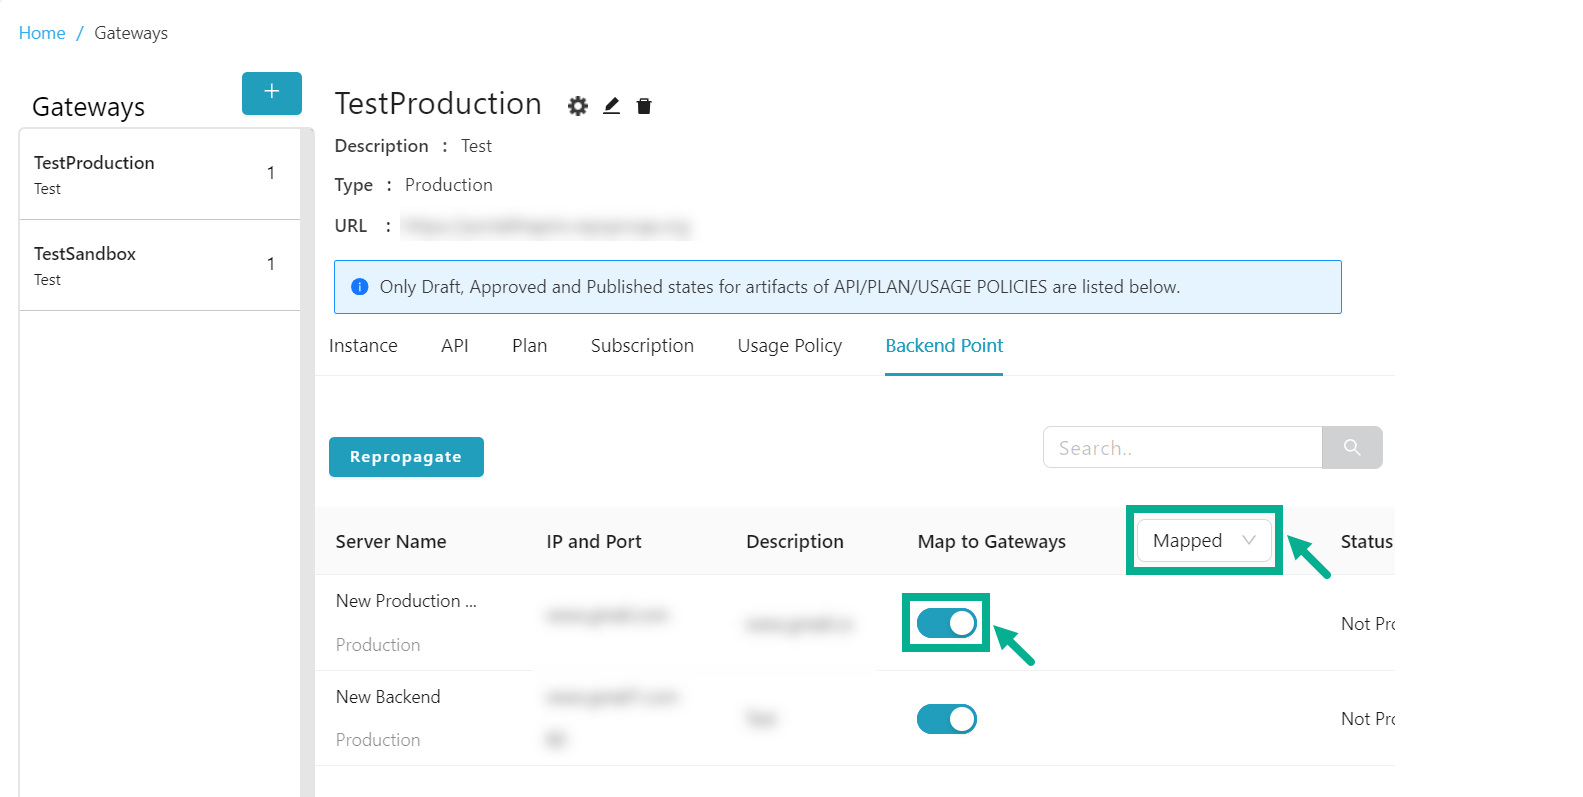
By default, the Mapped backend points were shown.
- Click and select either the All or Unmapped filters, to find the Unmapped backend points for Mapping.
- Enable the Map to Gateways toggle to map the backend point to the gateway.
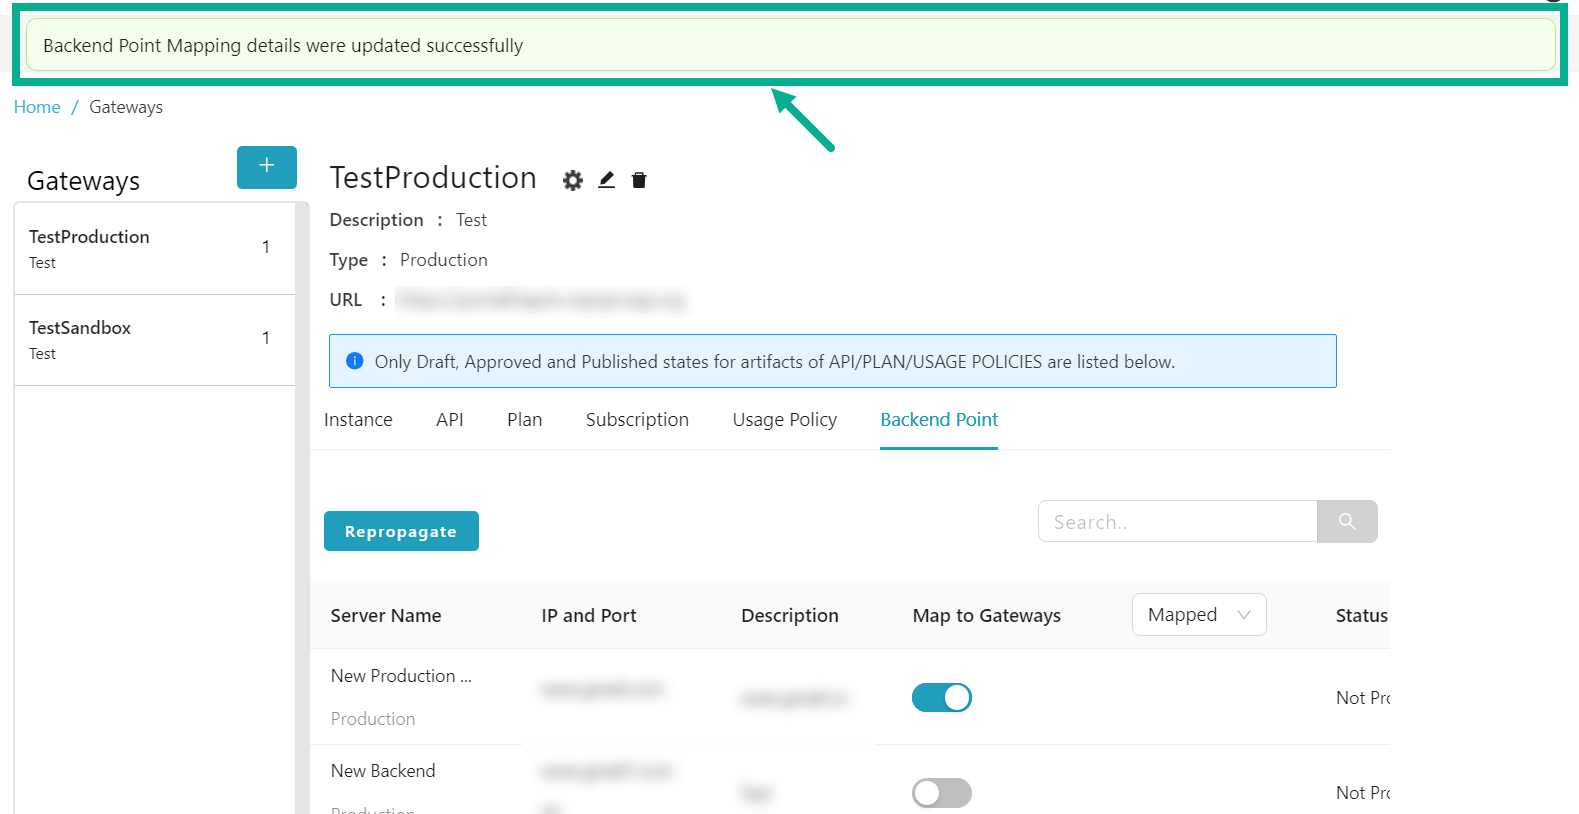
On proceeding, the confirmation message appears as shown below.
Unmap a Backend Point from the Gateway
A gateway-mapped backend that is associated with an API or any other artifact cannot be unmapped.
-
From the gateway listing page, click to select the gateway.
-
Click the Backend Point tab.
The Backend Point tab displays as shown below.
By default, the Mapped backend points were shown.
- Click and select either the All or Mapped filters, to find the Mapped backend points for Unmapping.
- Disable the Map to Gateways toggle to unmap the backend point from the gateway.
On proceeding, the confirmation message appears as shown below.
Repropagate the propagated Backend Point
-
From the gateway listing page, click to select the gateway.
-
Click the Backend Point tab.
The Backend Point tab displays as shown below.
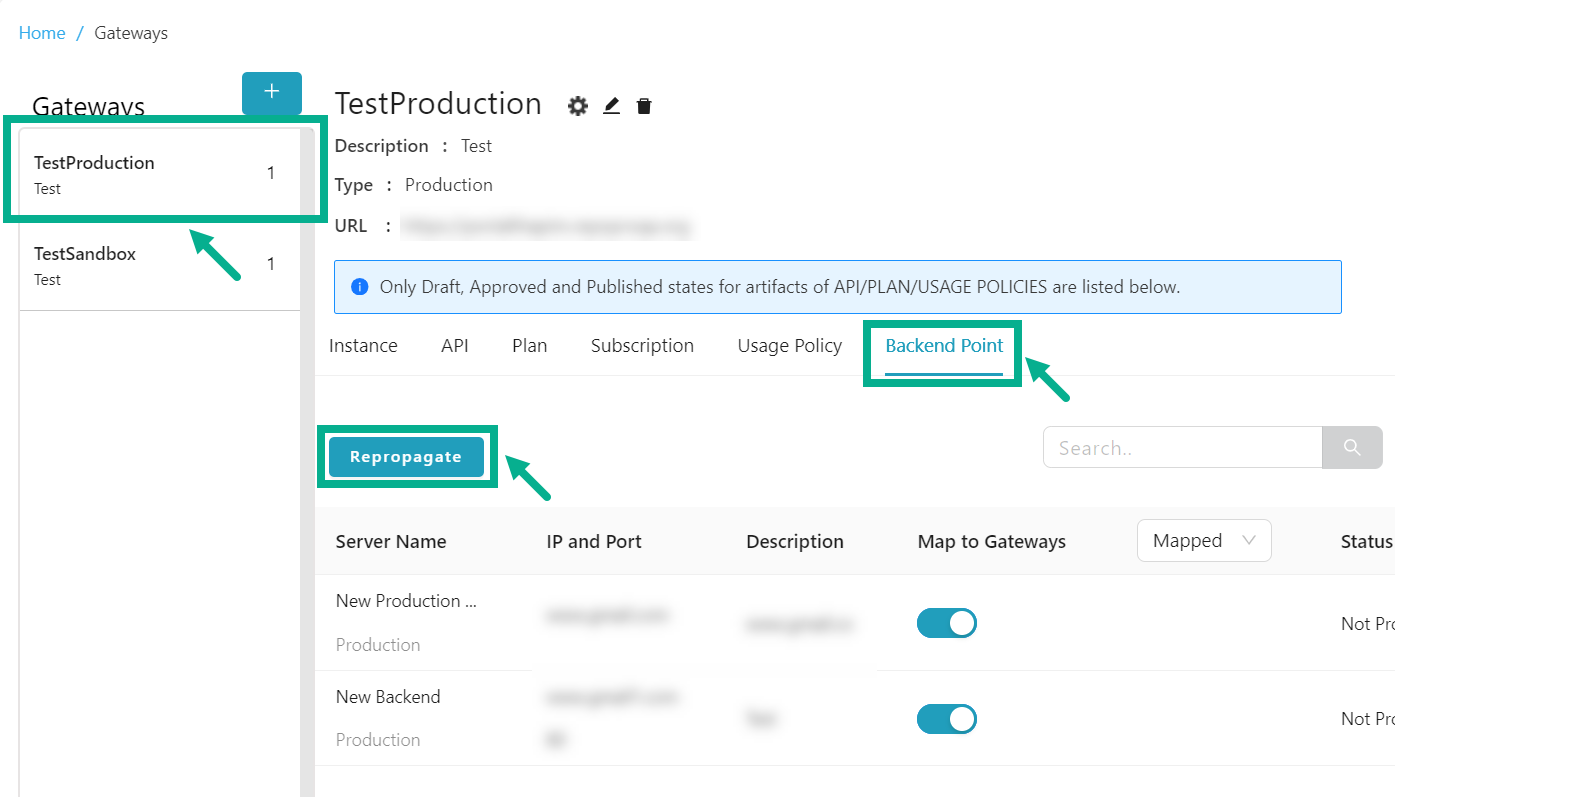
- Click Repropagate.
Propagate Backend Point dialog box appears as shown below.
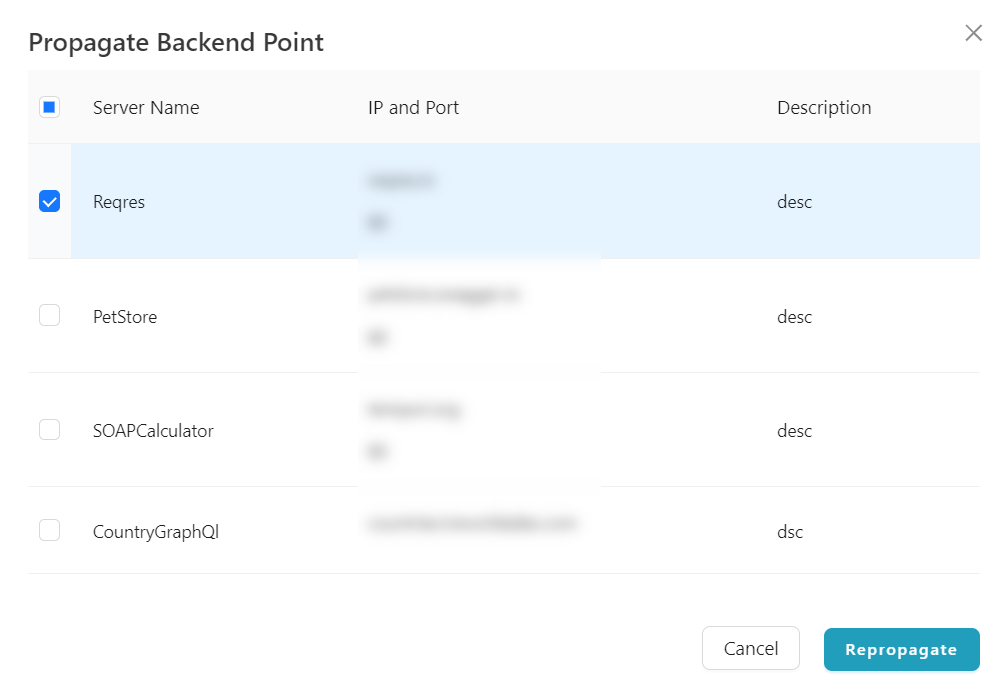
-
Select the Server Name by clicking the appropriate checkboxes.
-
Click Repropagate.
On proceeding, the confirmation message appears as shown below.
Edit REST Configuration
-
From the gateway listing page, click to select the gateway.
-
Click the Cogwheel icon.
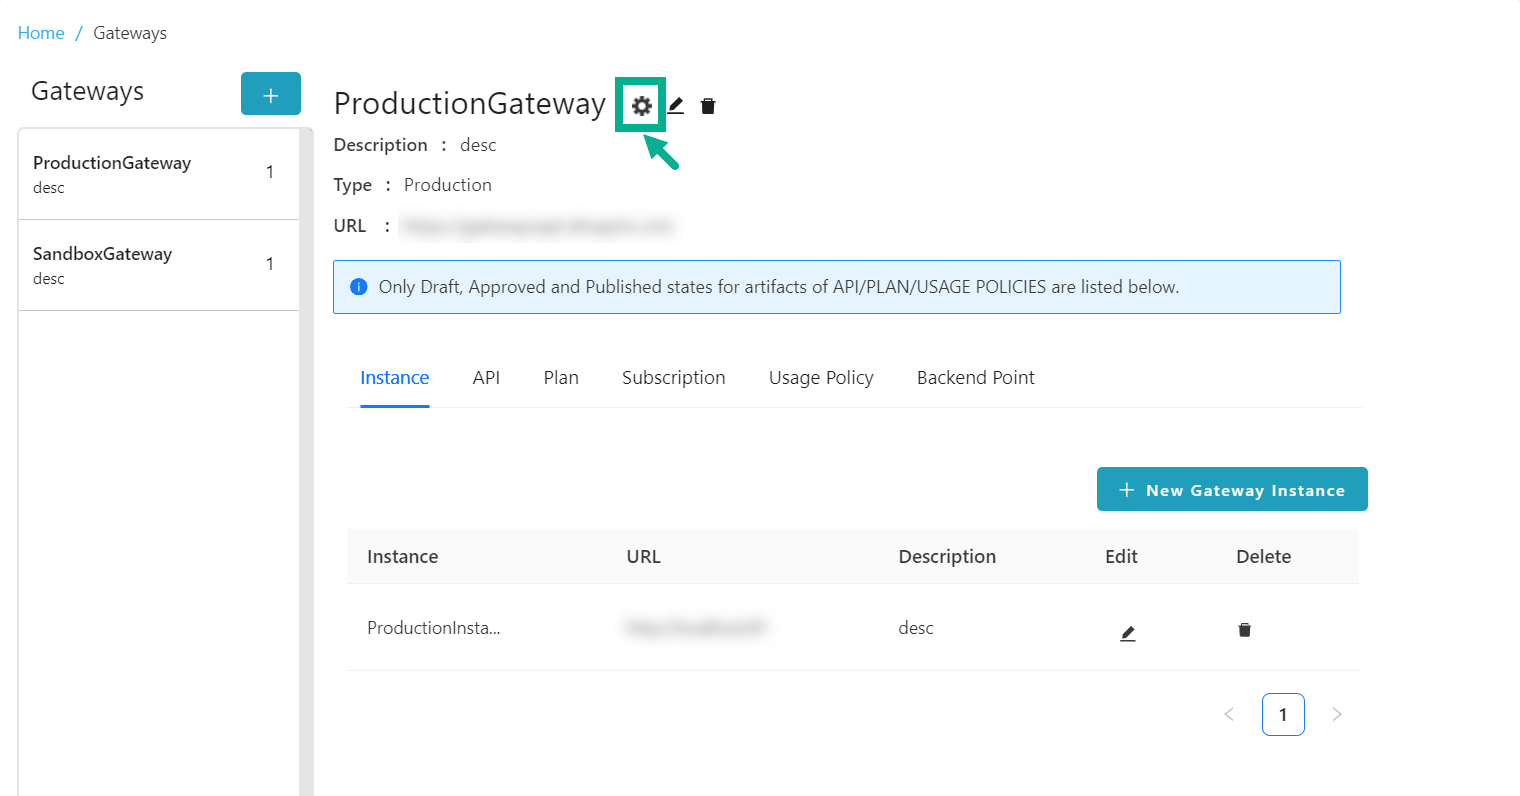
Gateway Configuration dialog box appears as shown below.
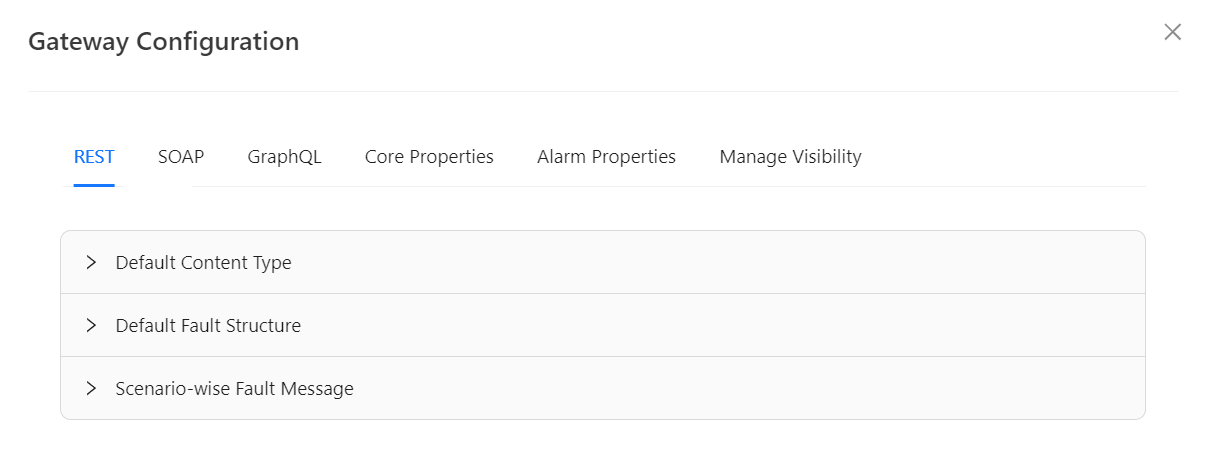
- Ensure that REST tab is selected.

-
Click to extend the Default Content Type.
-
Enable the Overwrite toggle to enable the Gateway Level Content Type, Plan Level Content Type and Resource Level Content Type if necessary.
On enabling, the Content Type options for Gateway/Plan/Resource levels will be enabled.
-
Click the appropriate Content Type (JSON/XML/PlainText) to select to be specified at Gateway/Plan/Resource Levels.
-
Click Save.
On saving, the confirmation message appears as shown below.

- Click to extend the Default Fault Structure.

- Enable the Overwrite toggle to enable the Fault Structure for Gateway Level, Fault Structure for Plan Level and Fault Structure for Resource Level if necessary.
On enabling, the Fault Structure for Gateway/Plan/Resource levels will be enabled.
-
Update the JSON Fault, XML Fault and Plain Text Fault at Gateway/Plan/Resource Levels.
-
Click Save.
On saving, the confirmation message appears as shown below.

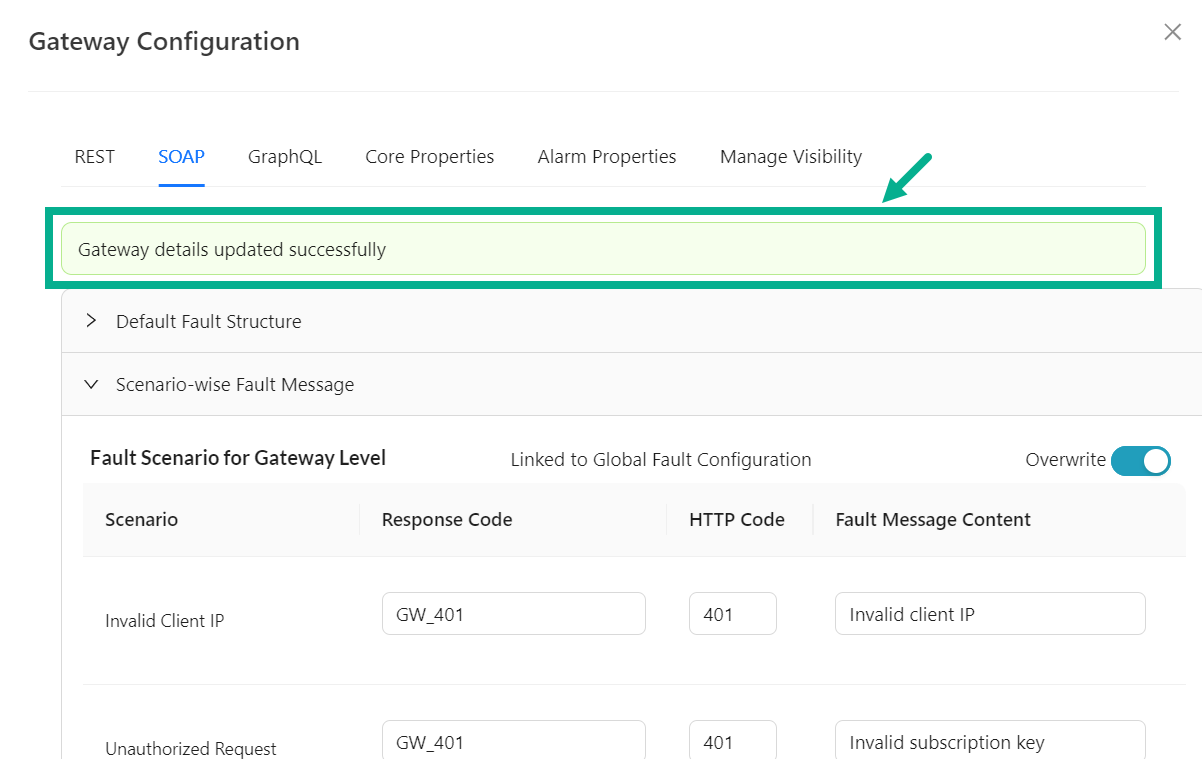
- Click to extend the Scenario-wise Fault Message.
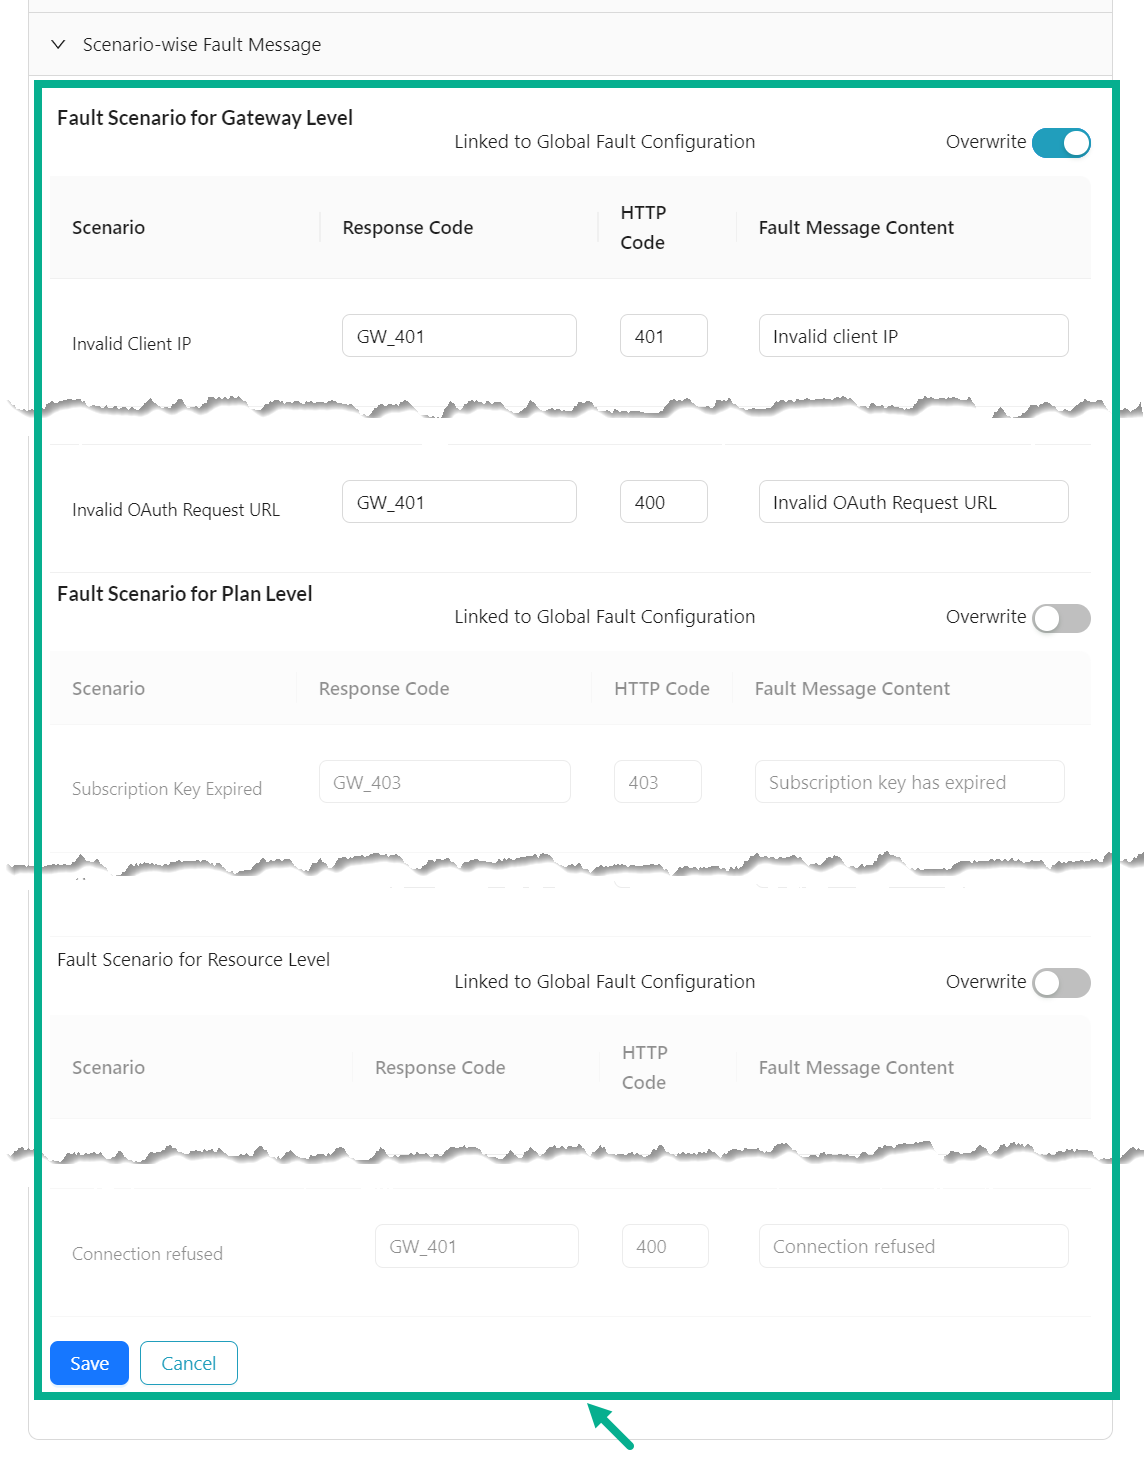
- Enable the Overwrite toggle to enable the Fault Scenario for Gateway Level, Fault Scenario for Plan Level and Fault Scenario for Resource Level if necessary.
On enabling, the Fault Scenario for Gateway/Plan/Resource levels will be enabled.
-
Update the Response Code, HTTP Code and Fault Message Content for the respected scenario at Gateway/Plan/Resource Levels.
-
Click Save.
On saving, the confirmation message appears as shown below.

Edit SOAP Configuration
-
From the gateway listing page, click to select the gateway.
-
Click the Cogwheel icon.
Gateway Configuration dialog box appears as shown below.
- Select the SOAP tab.
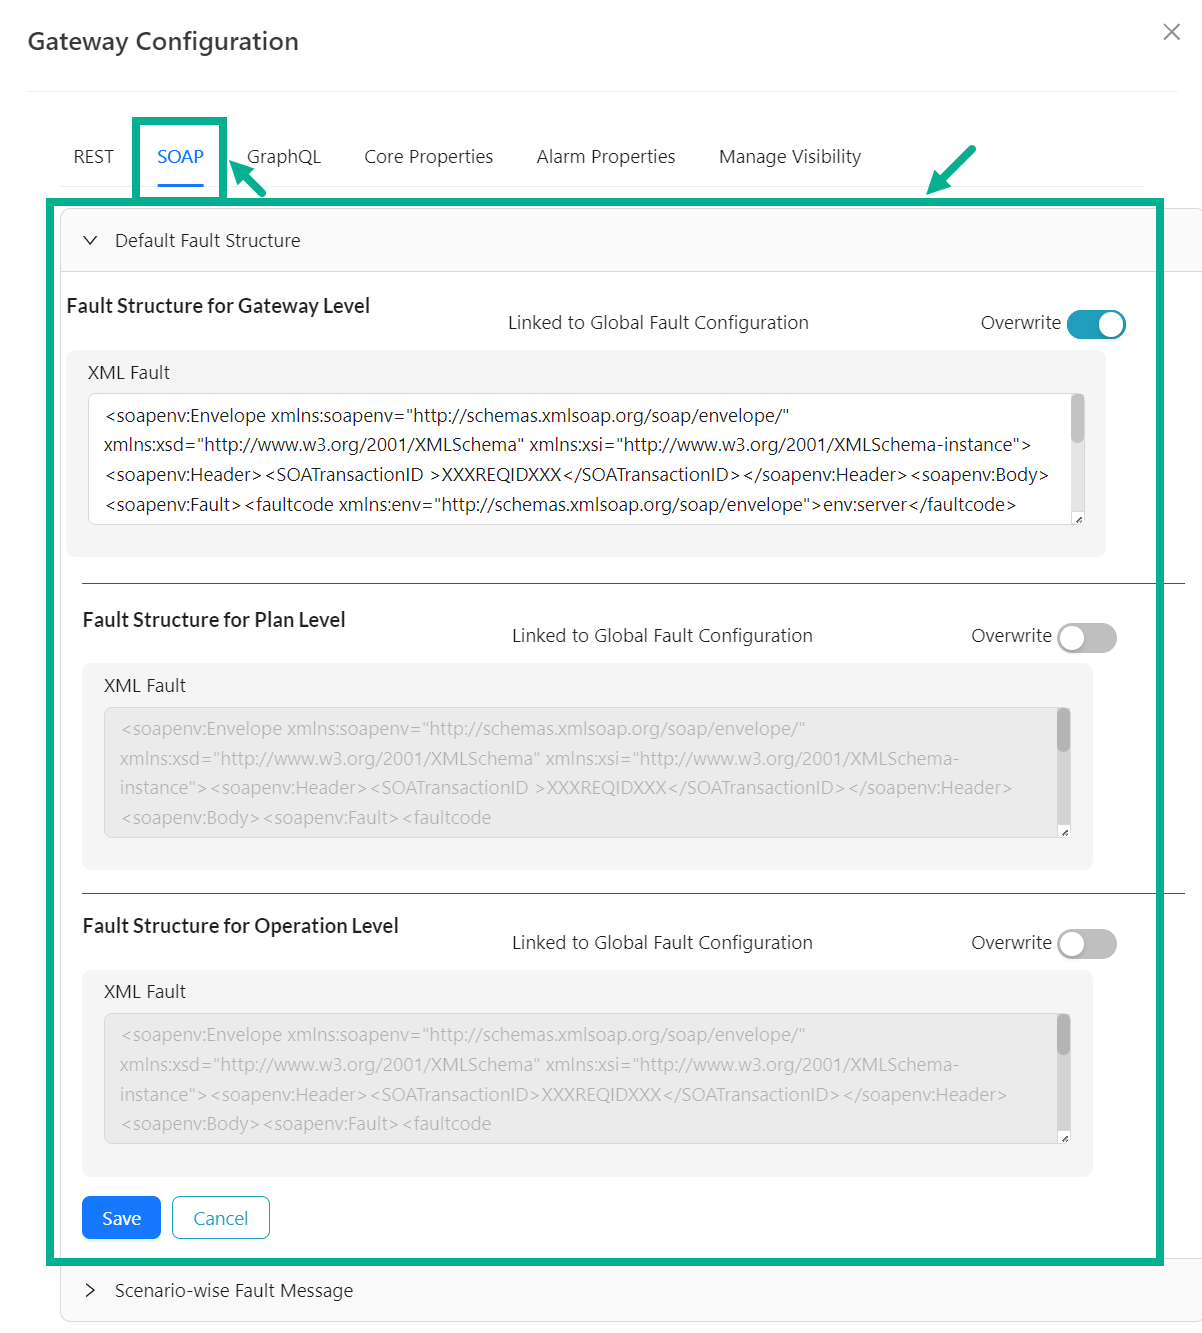
-
Click to extend the Default Fault Structure.
-
Enable the Overwrite toggle to enable the Fault Structure for Gateway Level, Fault Structure for Plan Level and Fault Structure for Operation Level if necessary.
On enabling, the Fault Structure options for Gateway/Plan/Operation levels will be enabled.
-
Update the XML Fault at Gateway/Plan/Operation Levels.
-
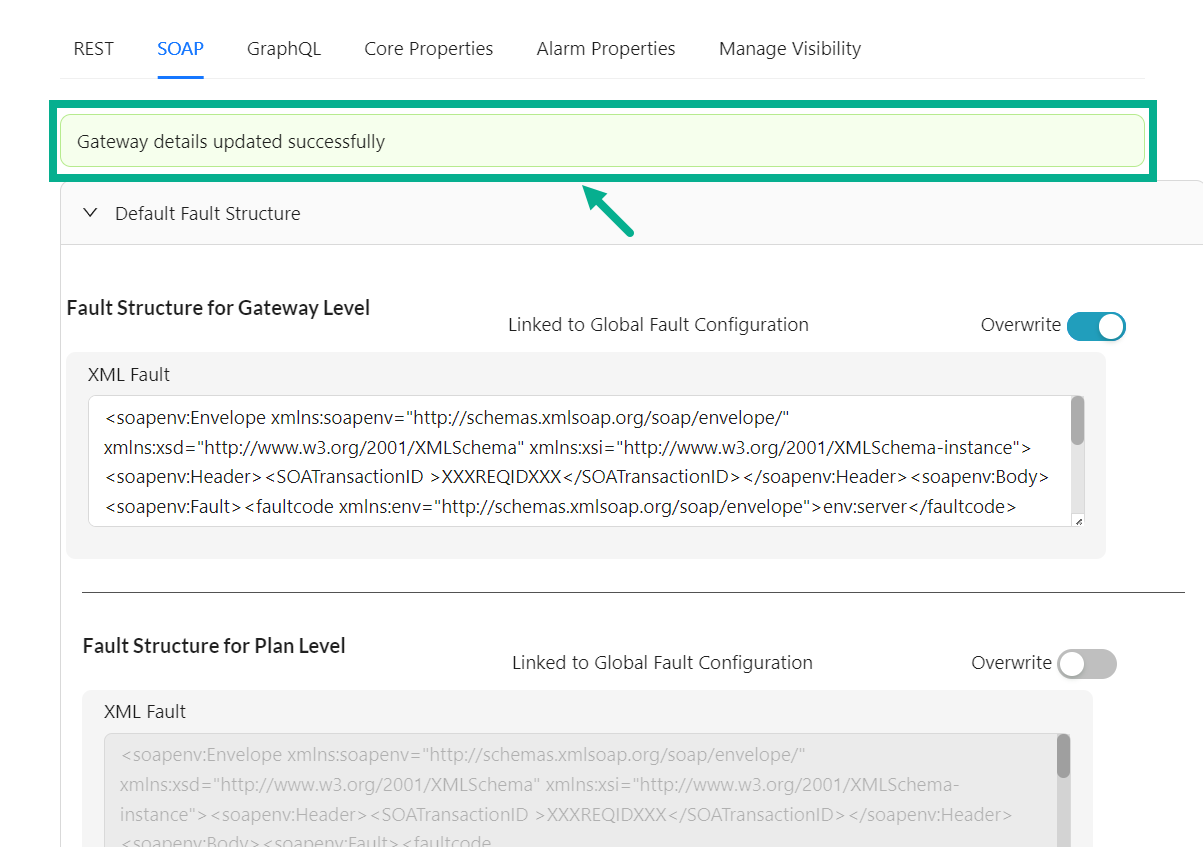
Click Save.
On saving, the confirmation message appears as shown below.
- Click to extend the Scenario-wise Fault Message.
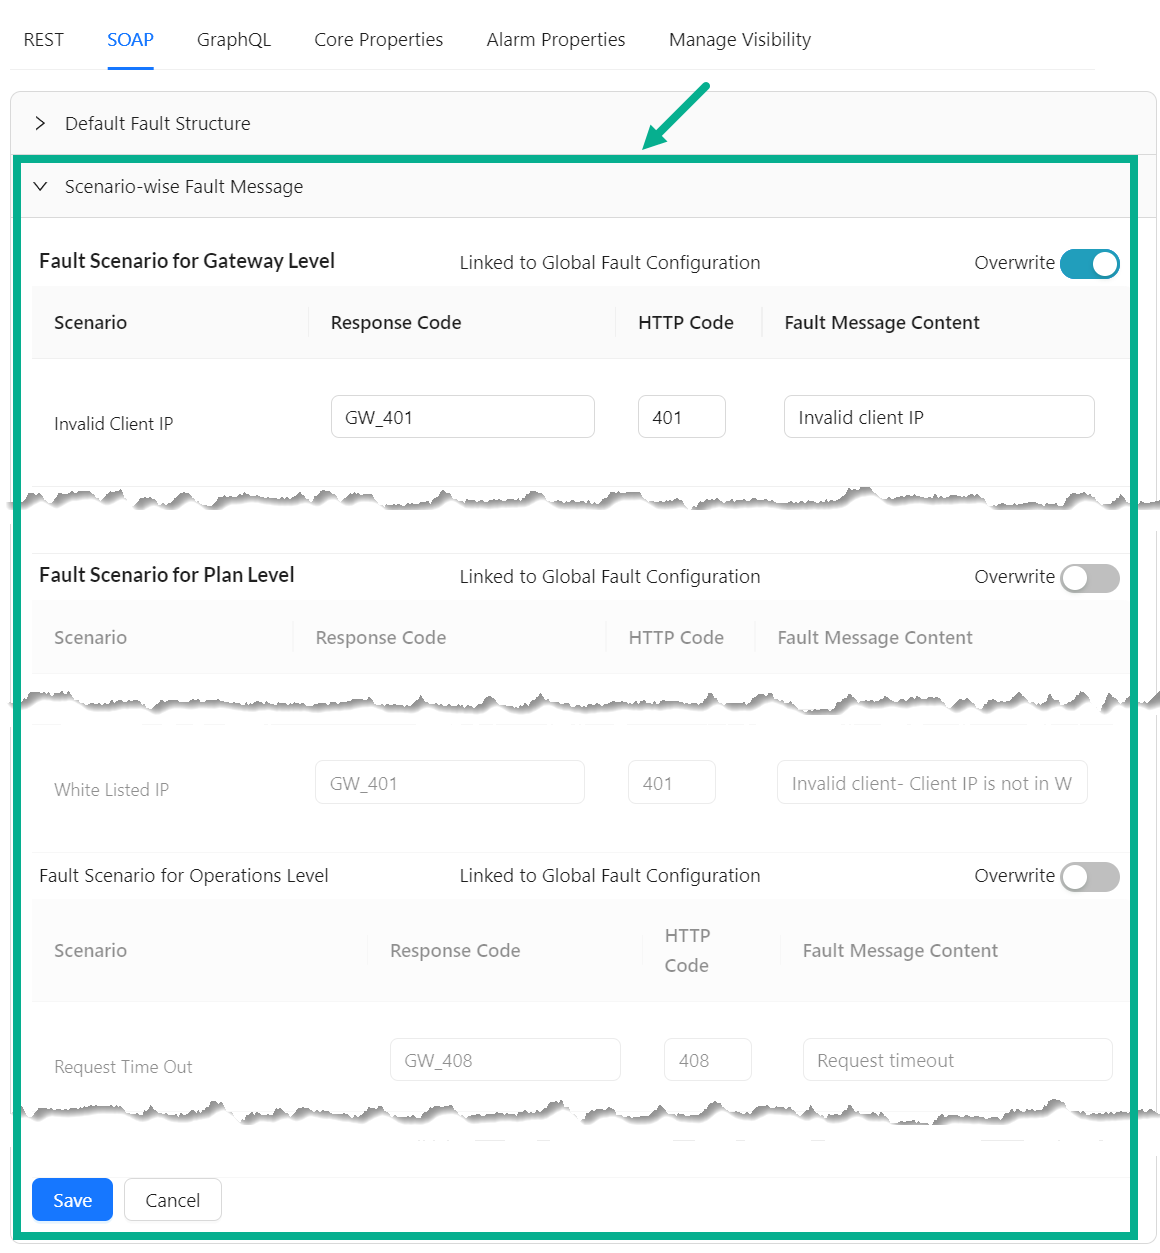
- Enable the Overwrite toggle to enable the Fault Scenario for Gateway Level, Fault Scenario for Plan Level and Fault Scenario for Operations Level if necessary.
On enabling, the Fault Scenario options for Gateway/Plan/Operation levels will be enabled.
-
Update the Response Code, HTTP Code and Fault Message Content for the respected scenario at Gateway/Plan/Operation Levels.
-
Click Save.
On saving, the confirmation message appears as shown below.
Edit GraphQL Configuration
-
From the gateway listing page, click to select the gateway.
-
Click the Cogwheel icon.
Gateway Configuration dialog box appears as shown below.
- Select the GraphQL tab.

-
Click to extend the Default Fault Structure.
-
Enable the Overwrite toggle to enable the Fault Structure for Gateway Level, Fault Structure for Plan Level and Fault Structure for Operation Level if necessary.
On enabling, the Fault Structure options for Gateway/Plan/Resource levels will be enabled.
-
Update the JSON Fault at Gateway/Plan/Resource Levels.
-
Click Save.
On saving, the confirmation message appears as shown below.

- Click to extend the Scenario-wise Fault Message.

- Enable the Overwrite toggle to enable the Fault Scenario for Gateway Level, Fault Scenario for Plan Level and Fault Scenario for Operations Level if necessary.
On enabling, the Fault Scenario options for Gateway/Plan/Resource levels will be enabled.
-
Update the Response Code, HTTP Code and Fault Message Content for the respected scenario at Gateway/Plan/Resource Levels.
-
Click Save.
On saving, the confirmation message appears as shown below.

Edit Core Properties
-
From the gateway listing page, click to select the gateway.
-
Click the Cogwheel icon.
Gateway Configuration dialog box appears as shown below.
- Select the Core Properties tab.
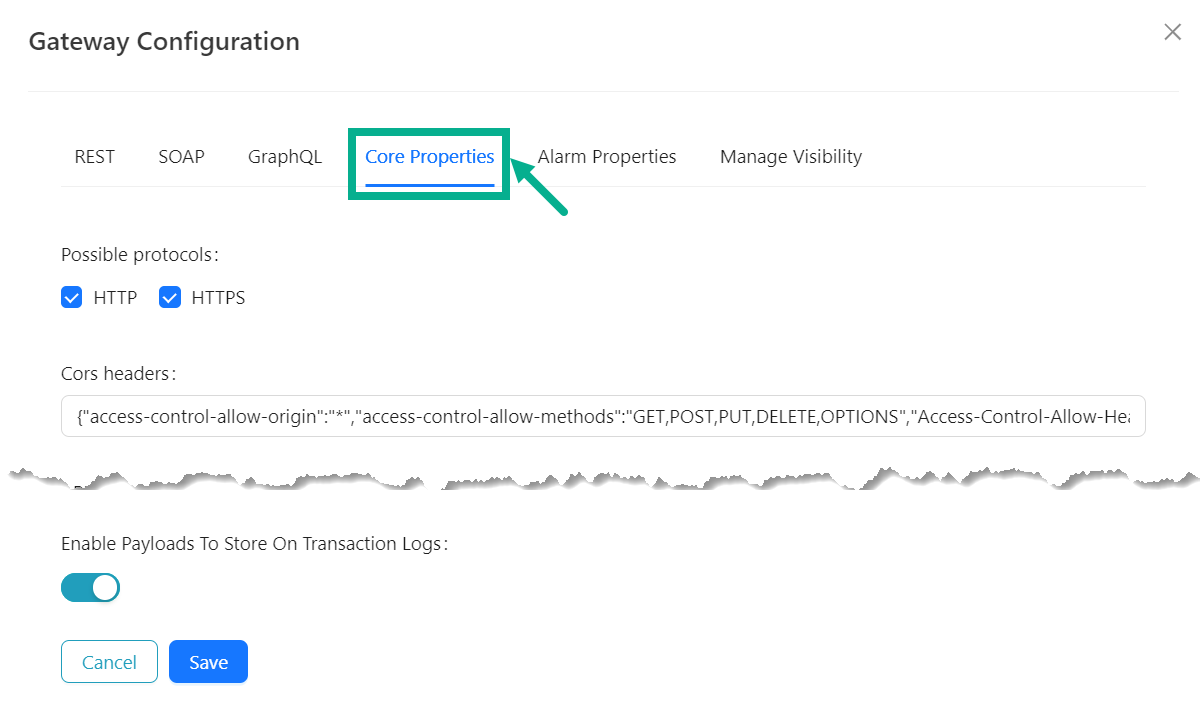
-
Under the Core Properties tab, update the pre-populated values that suit the requirements.
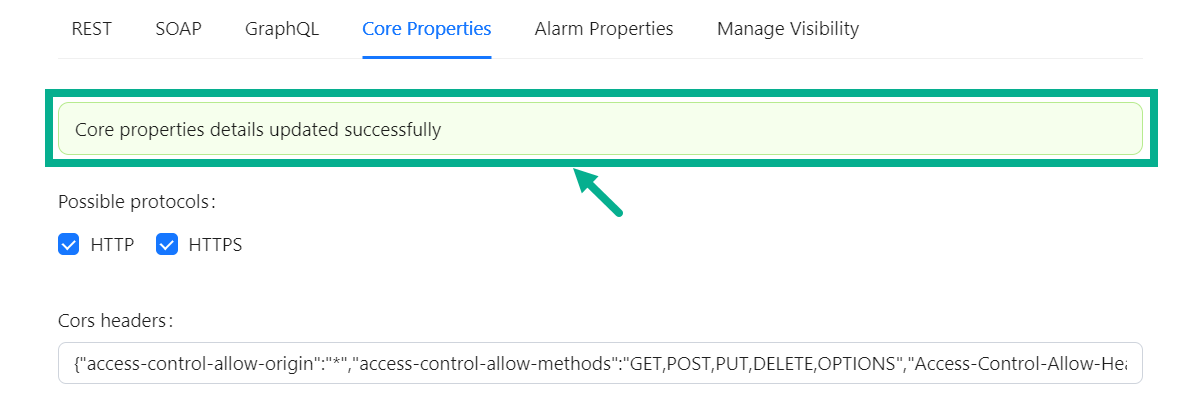
- Click the appropriate checkboxes to select HTTP and HTTPS as Possible Protocols.
- Update the Cors headers.
- Update the API Gateway Request Timeout.
- Update the Attachment Download Content Type.
- Update the Attachment Upload Fault Content Type.
- Enable/disable the oAuth Token Masked toggle as per the requirement.
- Enable/disable the Basic Header Masked toggle as per the requirement.
- Update the WSSE Name Space, Soap Envelope NS and oAuth Base Path.
- Enable/disable the oAuth Plugin Enabled toggle as per the requirement.
- Update the Http Client Connect Timeout, Http Client Idle Timeout and Http Client Max Pool Size.
- Enable/disable the Http Client Keep Alive toggle as per the requirement.
- Enable/disable the Http Client Pipelining toggle as per the requirement.
- Enable/disable the Http Client Trust All toggle as per the requirement.
- Update the Access Token Header Key, Client Id Header Key and Health Check URI.
- Enable/disable the Default Content Type For Request Enabled toggle as per the requirement.
- Enable/disable the Default Content Type For Response Enabled toggle as per the requirement.
- Update the Default Content Type Request SOAP1 1 and Default Content Type Response SOAP1 1.
- Update the Default Content Type Request SOAP1 2 and Default Content Type Response SOAP1 2.
- Update the Default Content Type Request REST JSON and Default Content Type Response REST JSON.
- Update the Default Content Type Request REST XML and Default Content Type Response REST XML.
- Update the Remove Token Delay, Quota Usage Policy Sync To DB Frequency, Dependency Connection Timeout and Health Check Fault Response Status Code.
- Enable/disable the Print Incoming Response Enabled toggle as per the requirement.
- Update the Response Content Types.
- Enable/disable the Response Content Type Validation toggle as per the requirement.
- Enable/disable the Response Content Type Validation toggle as per the requirement.
- Enable/disable the Allow Empty Response Payload toggle as per the requirement.
- Enable/disable the Enable Data Recording On Failure toggle as per the requirement.
- Update the oAuth Rate Limit.
- Select the oAuth Rate Limit Time Unit from the drop down.
- Enable/disable the Enable Payloads To Store On Transaction Logs toggle as per the requirement.
-
After updating, click Save.
On saving, the confirmation message appears as shown below.
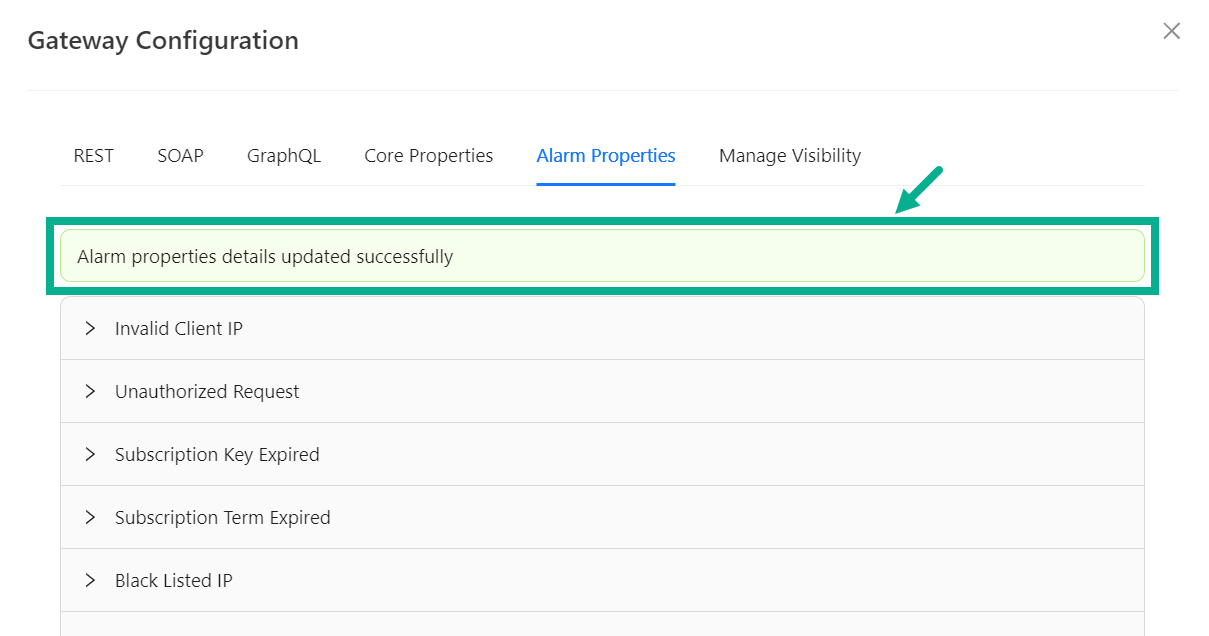
Edit Alarm Properties
-
From the gateway listing page, click to select the gateway.
-
Click the Cogwheel icon.
Gateway Configuration dialog box appears as shown below.
- Select the Alarm Properties.
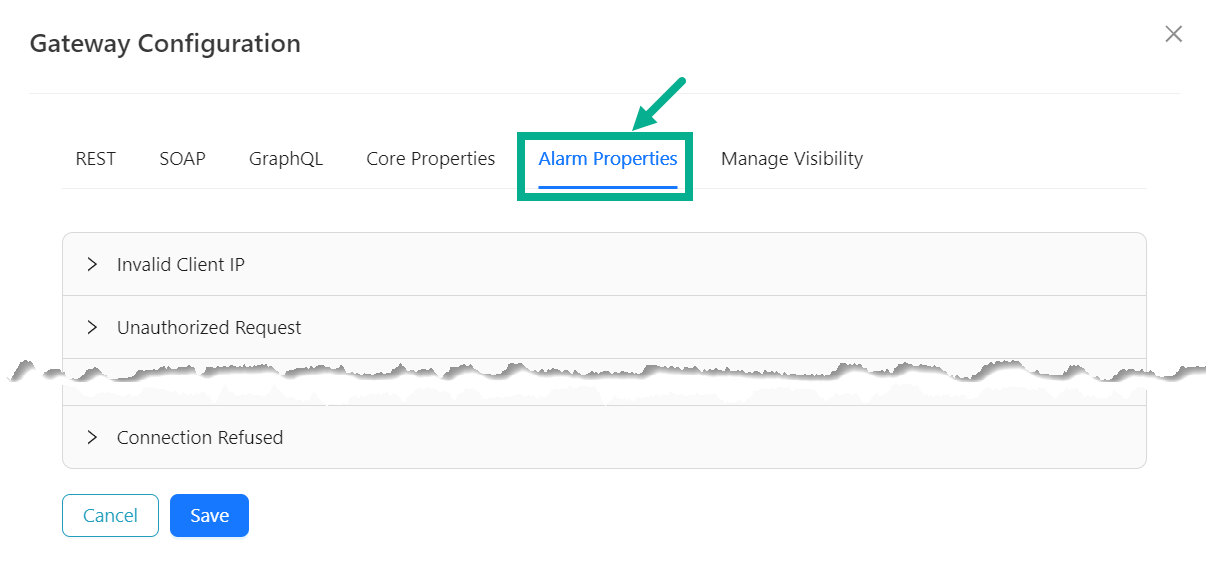
The sub-components available under the Alarm Properties are listed below.
- Invalid Client IP
- Unauthorized Request
- Subscription Key Expired
- Subscription Term Expired
- Black Listed IP
- White Listed IP
- Resource Not In Plan
- Request Time Out
- Invalid Authentication
- Rate Limit Exceeded
- Monthly Limit Exceeded
- Endpoint Limit Exceeded
- MCT Limit Exceeded
- Request Handling
- Response Handling
- Unexpected Error In Endpoint Protection
- Empty Request Body
- Invalid Request Body
- Request Schema Validation Failed
- Response Schema Validation Failed
- WSDL Not Found
- Actual EP Not Found
- Invalid Configuration
- Gateway Configuration
- OAuth Plugin Configuration
- OAuth Server
- OAuth Server Timeout
- OAuth Plugin Execution
- Invalid OAuth Request
- Connection Closed
- SSL Connection Failed
- Connection Refused
Below are the procedures for editing the Connection Refused sub-component as an example.
a. Click to expand the Connection Refused.
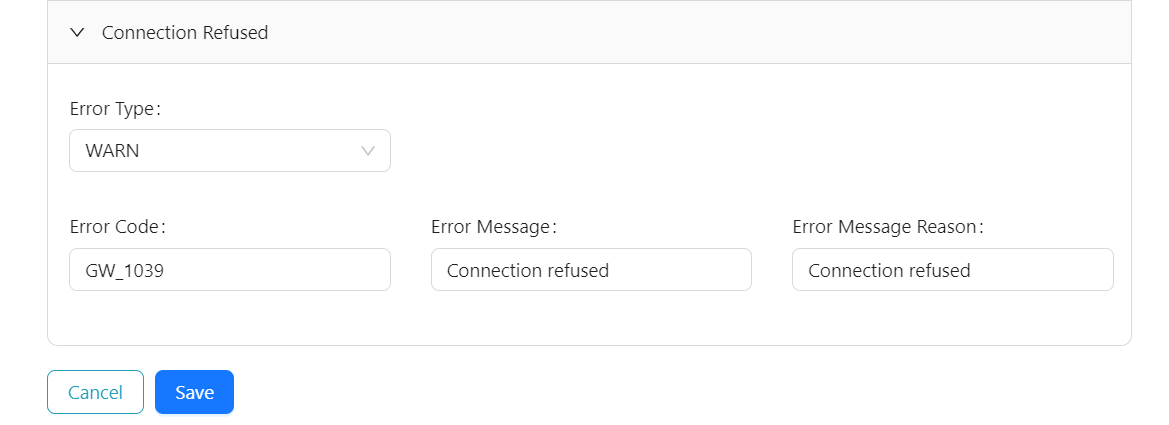
b. Select the Error Type from the drop down.
c. Update the Error Code, Error Message and Error Message Reason.
The steps involved in updating the other sub-component are similar to those described previously.
- After updating the sub-components, Click Save.
On saving, the confirmation message appears as shown below.
Manage Visibility
-
From the gateway listing page, click to select the gateway.
-
Click the Cogwheel icon.
Gateway Configuration dialog box appears as shown below.
- Click the Manage Visibility tab.

-
Enable/disable the checkbox for the respective publisher group.
-
Click Save to save the visibility selection.